When the garden starts producing green beans faster than you can eat them, pressure canning is one of the most dependable ways to stock the pantry. It is also the only safe home-canning method for plain green beans. Because beans are a low-acid food, they must be processed in a pressure canner to reach temperatures high enough to kill harmful bacteria.
Below is the same approach I use at home: straightforward steps, realistic pacing, and the little details that prevent siphoning, jar failures, and mushy beans. Processing times and pressures are based on USDA-style guidance (NCHFP and the USDA Complete Guide are the gold-standard references for home canning).
Safety first: why a pressure canner is required
Boiling-water canners top out around 212°F (100°C). Low-acid foods like green beans require higher heat to be safe for shelf storage. A pressure canner reaches around 240°F (116°C) at typical home-canning pressures (exact temperature varies with pressure and altitude), which is what makes this process safe.
- Do not water-bath can plain green beans.
- Do not use an Instant Pot or electric multicooker for canning. They are not recommended by USDA/NCHFP and most do not meet home-canning standards for safe processing.
- Use a tested recipe and processing time. The method below follows USDA-style guidance for plain beans (snap or Italian, whole or pieces).
- Do not thicken the jar contents with flour, starch, or other thickeners, and do not add fats (like bacon grease) unless a recipe is specifically tested for it.
What you need (and what you can skip)
Must-have equipment
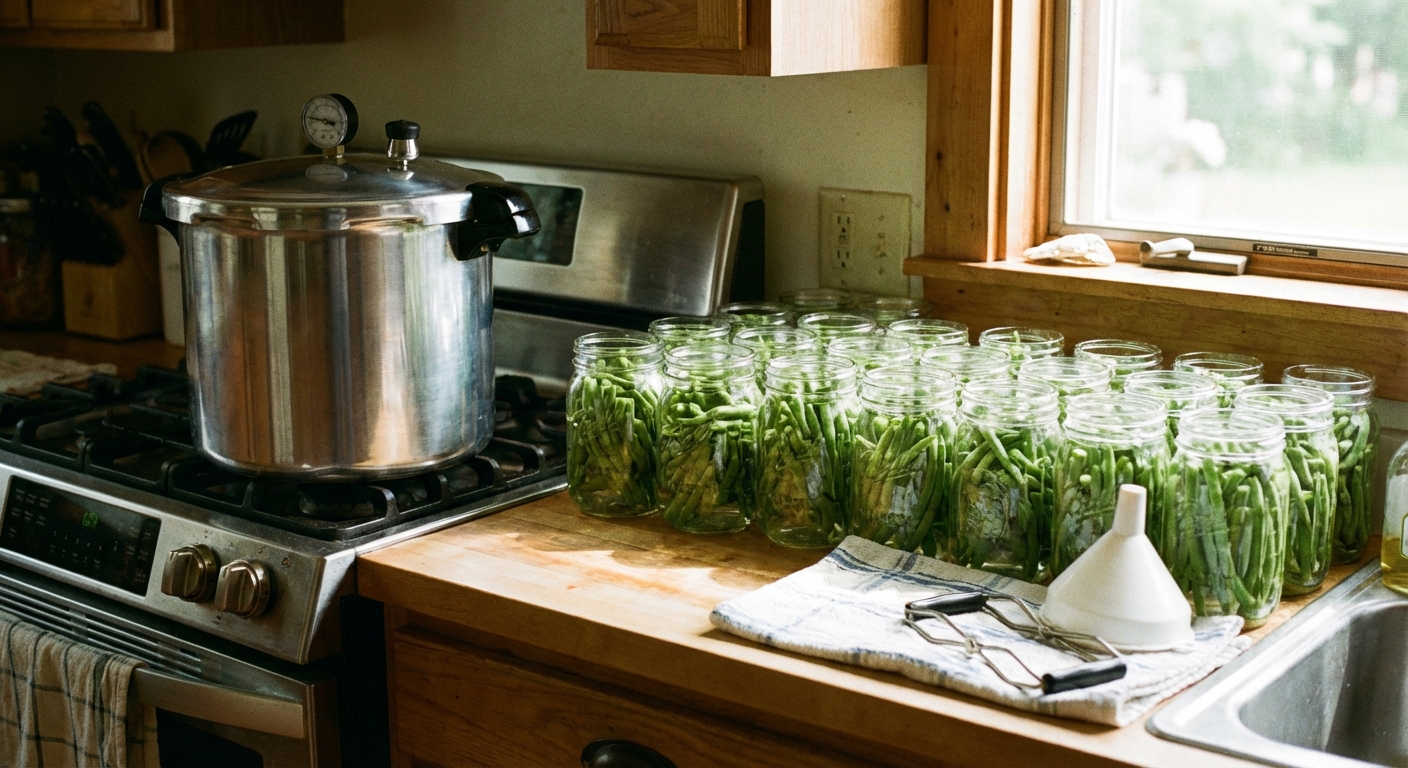
- Pressure canner (dial-gauge or weighted-gauge)
- 2-piece canning lids (new flat lids each time)
- Canning jars: pints or quarts
- Jar lifter, canning funnel, bubble remover or chopstick
- Clean towels and a timer
Ingredients
- Fresh green beans (tender, not overgrown)
- Water
- Salt is optional for flavor only
Helpful for planning
- Yield estimate: about 14 lb beans per canner load of 7 quarts, or about 9 lb per canner load of 9 pints (your pack style and bean size can shift this a bit).
If your canner has a dial gauge, plan to have it tested regularly through your local extension office or a trusted service. A slightly off gauge can mean underprocessing.
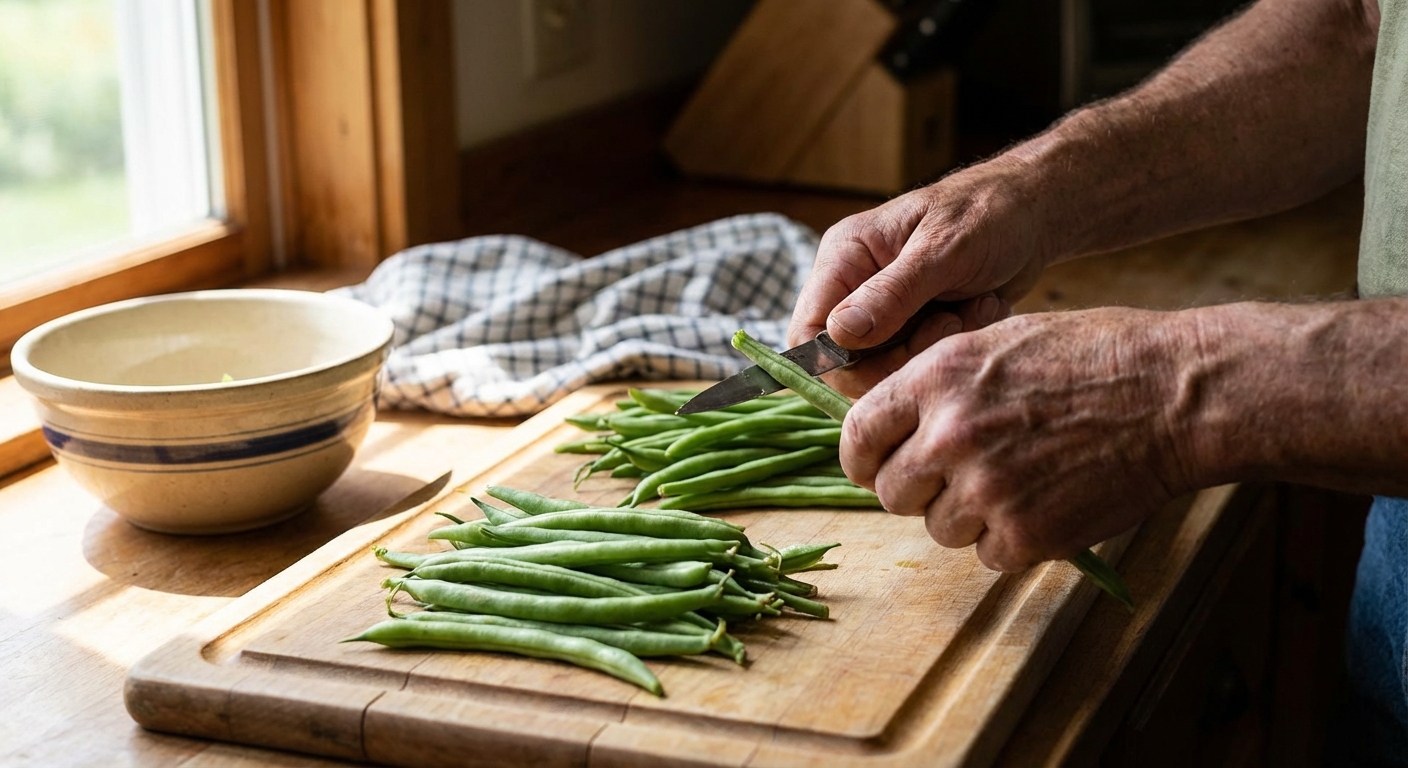
Prep your beans (this is where quality is decided)
- Pick and sort. Use firm, bright pods. Avoid limp beans or very seedy, overgrown pods if you want a good texture.
- Wash well. Rinse in cool water and lift beans out of the water if there is grit.
- Trim ends. Snap or cut off stem ends. Tails are optional.
- Cut to size. Leave whole or cut into 1-inch pieces. Keep sizing consistent so jars pack evenly.
Hot pack vs raw pack
You can can green beans using either method. Both are safe when processed correctly, but they behave differently in the jar.
Hot pack (my go-to)
- Beans are briefly cooked before packing into jars.
- Usually gives better jar fill and less floating.
- Often reduces siphoning because contents are already hot and settled.
Raw pack
- Pack raw beans into jars and cover with boiling water.
- Faster up front, but beans tend to shrink more and can float.
Step-by-step: pressure canning green beans
1) Get the canner ready
- Add the amount of water your pressure canner manual requires. Many canners use about 2 to 3 inches, but your model is the boss here.
- Place the canning rack in the bottom.
- Preheat the water so the canner is hot (not boiling hard) when jars go in. A common target is about 180°F for hot-pack jars and about 140°F for raw-pack jars.
2) Prepare jars and lids
- Wash jars in hot soapy water and rinse well.
- Keep jars warm until filling.
- Follow your lid manufacturer instructions for preparing lids.
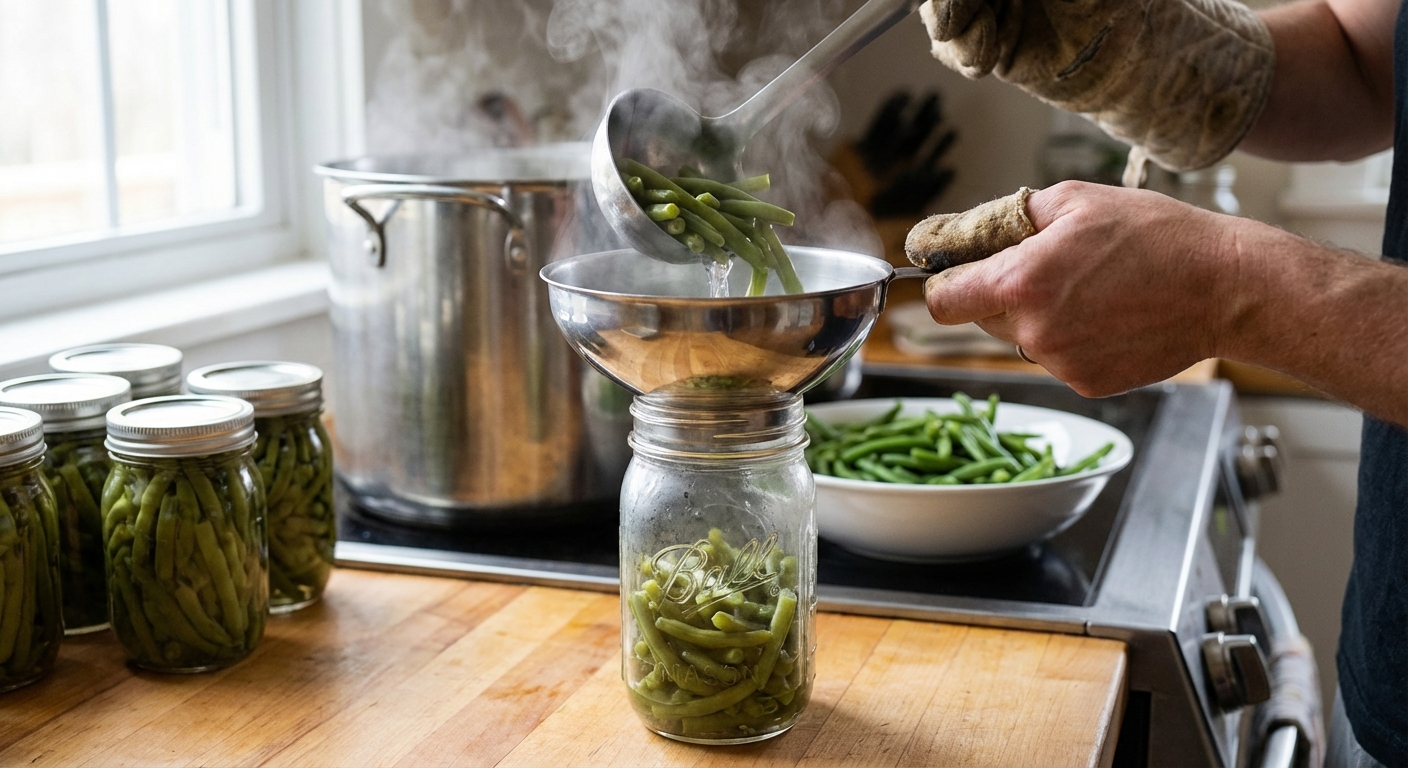
3) Hot pack (recommended)
Bring a pot of water to a boil, add beans, and boil or simmer for 5 minutes. Pack hot beans into hot jars.
Tip: Use fresh boiling water (or reheat your water back to a full boil) for topping off jars so you are not guessing at temperature.
4) Fill jars
- Add beans to jars, leaving 1 inch headspace.
- Cover beans with boiling water, keeping 1 inch headspace.
- Optional salt: 1/2 teaspoon per pint or 1 teaspoon per quart.
- Remove air bubbles by sliding a bubble remover down the inside edges of the jar. Do not mash the beans. Re-check headspace.
- Wipe rims clean, apply lid, and tighten band to fingertip tight.
5) Load the canner
Place jars on the rack. Lock the lid. Heat on high until a steady stream of steam vents from the vent pipe. Vent (exhaust) steam for 10 minutes.
6) Bring to pressure and start timing
After venting, apply the weight or close the petcock, then bring the canner up to the correct pressure. Start your timer only when the canner is at the correct pressure.
Processing times (plain green beans)
USDA-style processing times for snap or Italian green beans (whole or pieces) are:
- Pints: 20 minutes
- Quarts: 25 minutes
Pressure by altitude
Use the pressure that matches your canner type and altitude. If you are unsure, confirm with the current USDA/NCHFP tables or your local extension office.
Dial-gauge canner
- 0 to 2,000 ft: 11 psi
- 2,001 to 4,000 ft: 12 psi
- 4,001 to 6,000 ft: 13 psi
- 6,001 to 8,000 ft: 14 psi
Weighted-gauge canner
- 0 to 1,000 ft: 10 psi
- Above 1,000 ft: 15 psi
7) Cool down the right way
- When time is up, turn off heat and let the canner depressurize naturally.
- Do not force-cool with cold water, fans, or moving the canner.
- Once pressure is at zero (dial) or the safety lock drops (many models), wait 10 more minutes, then open the lid away from your face.
8) Rest jars, then check seals
- Lift jars straight up and set on a towel, leaving space between jars.
- Do not tighten bands or tip jars.
- Let sit 12 to 24 hours.
- Remove bands, check seals, wipe jars, label, and store.
Common issues
Liquid loss (siphoning)
- Usually caused by pressure swings or rushing the cool down.
- Keep heat steady during processing.
- Vent for the full 10 minutes.
- Let the canner cool naturally, then wait the extra 10 minutes before opening.
If a jar siphons but still seals: it is generally considered safe as long as the seal is strong and the jar is clean, but the exposed food may darken and texture can suffer. Wipe the jar, label it, and plan to use it first. If any beans are stuck on the underside of the lid or above the liquid line, keep an eye on that seal during storage.
Beans floating
- More common with raw pack.
- Pack beans firmly but do not crush them.
- Hot pack helps a lot.
Soft or mushy beans
- Older beans, overgrown pods, or long holding times before canning can lead to softer texture.
- Pick young beans and can them the same day if you can.
A jar did not seal
- Refrigerate and use within a few days, or reprocess within 24 hours using a new lid and full processing time.
- Check jar rim for tiny nicks and replace jars that repeatedly fail.
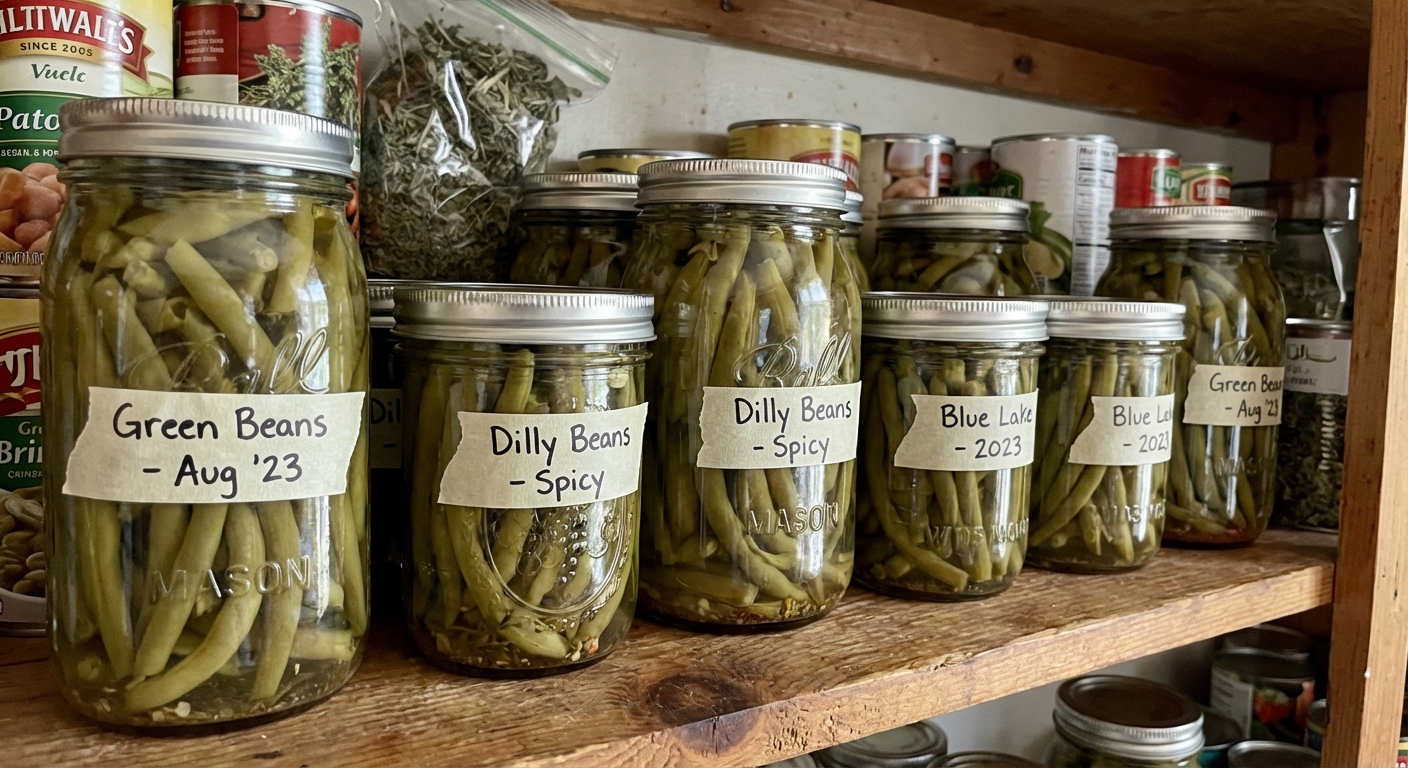
Storage and shelf life
- Store sealed jars in a cool, dark place.
- Remove screw bands for storage to prevent rust and to make seal failures easier to notice.
- For best quality, use within about 12 months. If the seal is intact and the jar shows no spoilage, many home-canned foods keep longer, but quality slowly drops.
Before eating: if a jar spurts liquid, smells off, looks foamy, or the lid is unsealed, do not taste it. Dispose of it safely.
Flavor ideas that stay canning-safe
For plain green beans, keep it simple inside the jar. You can always dress them up when you open them.
- Sauté with butter and garlic, finish with salt and pepper.
- Warm with a little bacon fat and a splash of vinegar.
- Add to soups and stews as a quick vegetable.
If you want seasoned beans in the jar, only use recipes that are specifically tested for that purpose. Random additions like garlic, onions, flour, or bacon can change how heat moves through the jar.
Quick checklist
- Pressure canner in good condition, gasket and vent clean
- Correct jar size and processing time selected
- Beans trimmed and washed
- 1 inch headspace
- Vented 10 minutes
- Steady pressure for the full time
- Natural cool down, then 10-minute rest before opening
If you follow that list, you are already ahead of most first-timers.
FAQ
Can I water-bath can green beans if I add vinegar or lemon?
Not for plain green beans using typical home methods. Acidifying enough to safely water-bath can requires a tested pickled recipe. For non-pickled beans, use a pressure canner.
Do I have to use salt?
No. Salt is optional and only affects flavor, not safety.
Should I blanch beans before pressure canning?
Blanching is essentially what the hot pack step accomplishes. It helps with pack quality and can reduce floating.
What if my pressure drops during processing?
Bring it back up to the correct pressure and restart the timer from the beginning. This is important for safety.

Jose Britto
I’m Jose Britto, the writer behind Green Beans N More. I share practical, down-to-earth gardening advice for home growers—whether you’re starting your first raised bed, troubleshooting pests, improving soil, or figuring out what to plant next. My focus is simple: clear tips you can actually use, realistic expectations, and methods that work in real backyards (not just in perfect conditions). If you like straightforward guidance and learning as you go, you’re in the right place.