When the garden is producing, green beans are usually the first vegetable that makes me feel rich. You go out for “a handful” and come back with a bowl. This recipe is my favorite way to cook them because it stays simple, it respects the fresh bean crunch, and it works even when your beans are a little uneven in size (which is real life).
It is a quick blanch followed by a hot skillet finish with garlic, lemon, and butter. You get bright flavor, a little browning, and beans that still snap.

What makes this my go-to
- Crisp-tender every time: blanching gives you a head start, then the skillet adds flavor.
- Uses what you have: garden beans, store beans, even those slightly bendy beans that need cooking today.
- Scales up easily: a quick side for two or a big batch for a backyard dinner.
- Plays nice with other meals: chicken, fish, burgers, pasta, holiday spreads.
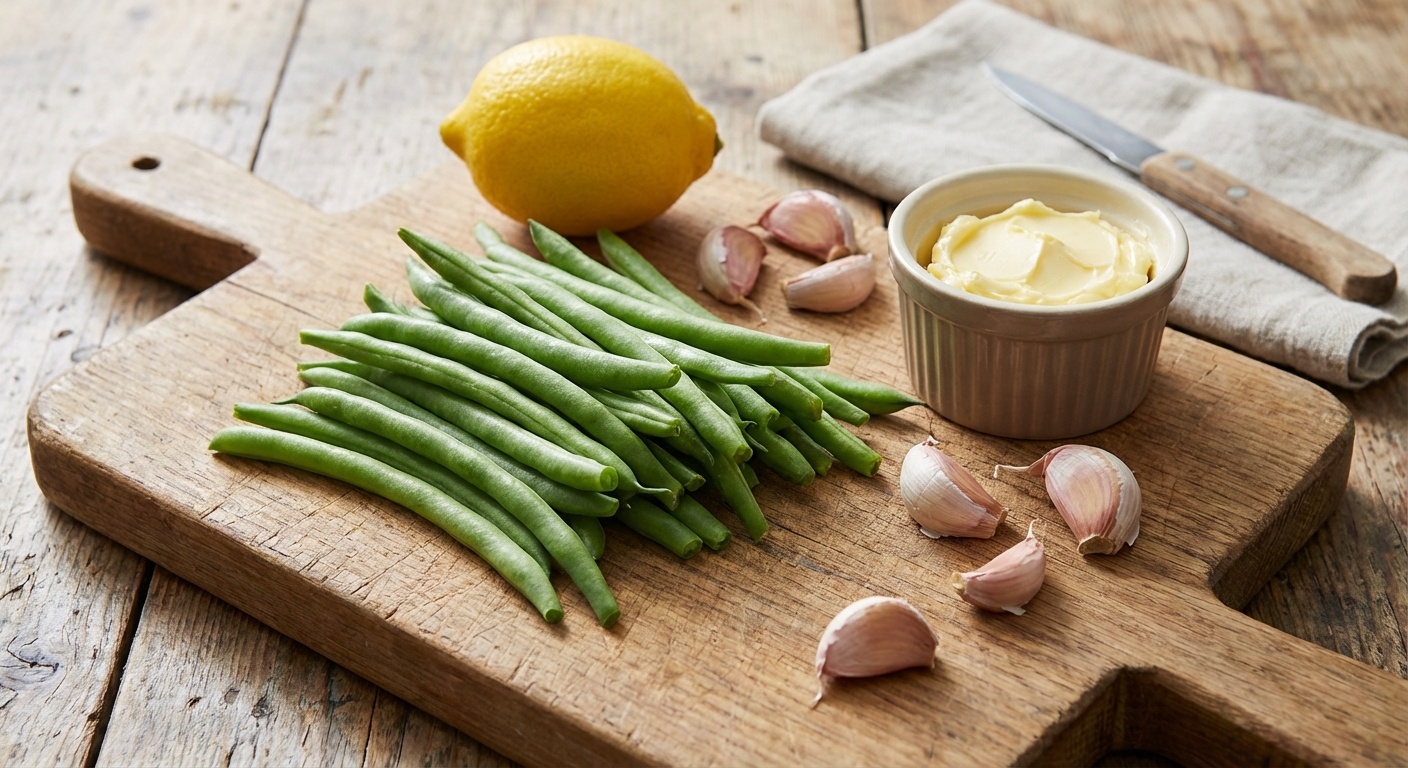
Ingredients
This makes about 4 side servings.
- 1 pound fresh green beans, ends trimmed
- 1 to 2 tablespoons olive oil
- 3 cloves garlic, thinly sliced or minced
- 1 tablespoon butter
- Zest of 1 lemon (optional but worth it)
- 1 to 2 tablespoons lemon juice (to taste)
- 1/2 teaspoon kosher salt, plus more as needed
- Black pepper, to taste
- Optional finish: pinch of red pepper flakes, grated Parmesan, or toasted sliced almonds
How I make them (step by step)
1) Prep the beans
Trim the stem ends. If your beans are extra long, snap or cut them in half so they are easier to toss and eat.
2) Quick blanch
Bring a large pot of salted water to a boil. Add the beans and cook for 2 to 3 minutes. You want them brighter green and just barely tender, not soft.
Drain and rinse under cold water, or drop them into a bowl of ice water for a minute, then drain well. This stops the cooking and keeps the color.
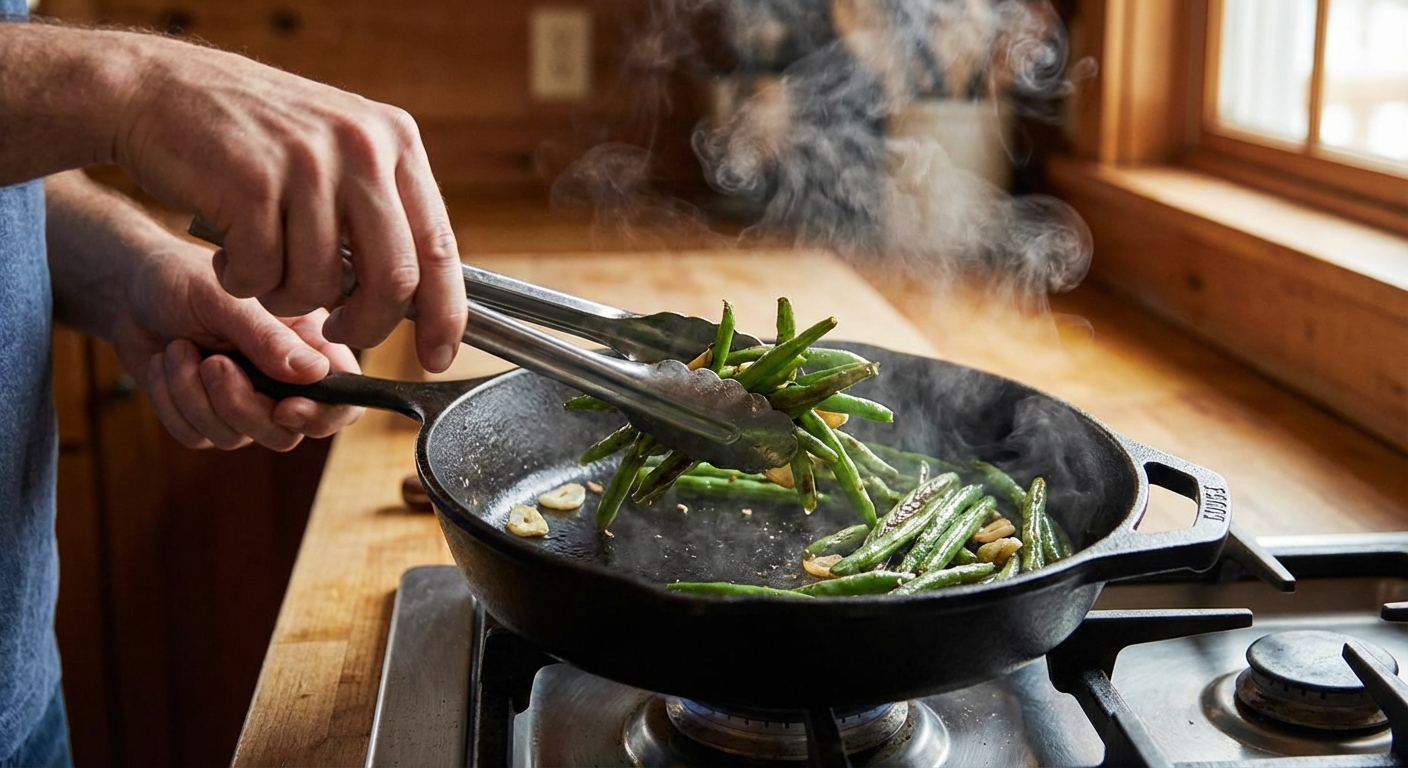
3) Hot skillet finish
Heat a large skillet over medium-high heat. Add olive oil, then add the drained beans. Let them sit for about a minute so they start to blister a little, then toss.
Keep cooking and tossing for another 1 to 2 minutes, just to warm them through and pick up a little color.
Add garlic and cook for 30 to 60 seconds, just until fragrant. Keep it moving so the garlic does not burn.
4) Season and brighten
Turn off the heat and add the butter, lemon zest (if using), and lemon juice. Toss well. Taste, then add salt and pepper as needed.
5) Serve right away
These are best hot, straight from the skillet while they still have that snap.
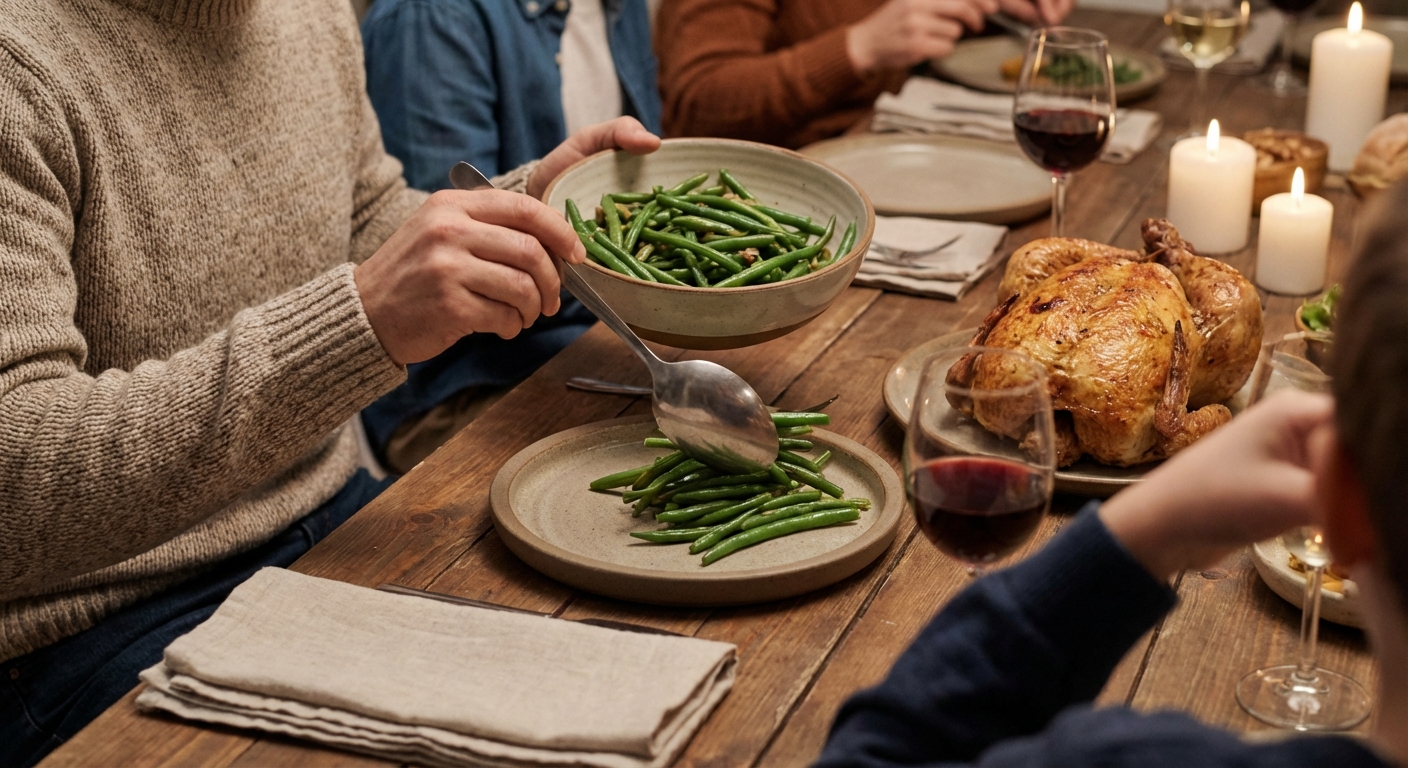
How to serve
I usually serve these family-style in a warm bowl and put the lemon wedges right on top. That way everyone can squeeze a little extra over their own portion. If I am being honest, I eat a few straight out of the pan while I am “checking seasoning.” That is quality control.
If the beans are garden-fresh, the kitchen smells like garlic and summer, and that first bite is exactly what I want: green, buttery, and bright. The lemon keeps it from tasting heavy, even when you go back for more.
Tips that actually help (especially with homegrown beans)
- Dry the beans before the skillet: water on the beans will steam them. Drain well and pat dry if needed.
- Do not crowd the pan: if you want browning, give them space. Use your biggest skillet or cook in two batches.
- Garlic goes in late: burnt garlic turns bitter fast. Add it once the beans are already hot.
- Adjust blanch time for thickness: thin beans need closer to 2 minutes, thicker beans closer to 3.
- Salt at the end if your butter is salty: taste first. It is easy to overdo it.
Easy variations (same method, different vibe)
Parmesan garlic beans
Finish with a small handful of grated Parmesan and black pepper.
Spicy skillet beans
Add a pinch of red pepper flakes with the garlic. A tiny bit goes a long way.
Almond crunch
Toast sliced almonds in the skillet first, remove, then cook the beans. Sprinkle almonds on top at the end.
“Pantry week” beans
No lemon? Use a splash of vinegar (white wine vinegar or apple cider vinegar) at the end. Start small and taste.
Common problems and quick fixes
My beans turned mushy
They blanched too long, stayed hot too long after draining, or cooked too long in the skillet. Next time, shorten the blanch and make sure you fully cool them right away with cold running water or an ice bath. That quick “shock” stops carry-over cooking, which is usually the real culprit.
My beans taste flat
They usually need one of two things: salt or acid. Add a pinch more salt, then a small squeeze of lemon, and taste again.
My garlic burned
Lower the heat a bit and add garlic later. You want fragrant, not browned-dark.
What to serve with this
- Grilled chicken or baked thighs
- Salmon, tilapia, or shrimp
- Burgers and corn on the cob
- Pasta with a light sauce
- Holiday mains that need something green and fresh
Quick storage and reheating
If you have leftovers, store them in a sealed container in the fridge for up to 3 days. Reheat in a skillet over medium heat with a tiny splash of water, just until warmed through. Microwave works, but the skillet keeps the texture better.
Printable-style recap
Blanch beans 2 to 3 minutes in salted boiling water, then cool in cold water or an ice bath and drain well. Sauté in hot oil 2 to 3 minutes, just to warm and lightly blister. Add garlic for 30 to 60 seconds. Finish with butter, lemon zest, lemon juice, salt, and pepper.
If you try it with your own garden beans, I would love to know what variety you grew and whether you like them more on the snappy side or the tender side. That one detail changes the whole cook time.

Jose Britto
I’m Jose Britto, the writer behind Green Beans N More. I share practical, down-to-earth gardening advice for home growers—whether you’re starting your first raised bed, troubleshooting pests, improving soil, or figuring out what to plant next. My focus is simple: clear tips you can actually use, realistic expectations, and methods that work in real backyards (not just in perfect conditions). If you like straightforward guidance and learning as you go, you’re in the right place.