Green beans are one of the most beginner-friendly vegetables you can grow from seed. They sprout fast, they do not need fancy gear, and they go from planting to harvest quickly. The main trick is timing. Beans hate cold soil, and planting too early is the fastest way to end up with seeds that sit, rot, or sprout unevenly.
This guide walks you through exactly how I start green beans from seed in real backyard beds and containers, including what to do when germination is spotty.
Pick the right type first
There are two main kinds of green beans, and the planting method is almost the same. The difference is support, spacing, and how long they produce.
Bush beans
- Grow as compact plants that usually do not need a trellis.
- Best for raised beds, small gardens, and containers.
- Harvest window is often concentrated, meaning you get a lot over a shorter period.
Pole beans
- Climb and need a trellis, netting, or a fence.
- Best for maximizing harvest in a small footprint.
- Harvest window is longer since they keep producing as they grow.
If you are brand new, bush beans are the simplest start. If you want the biggest harvest per square foot and you can add a support, go pole.
If you have choices at the store, I also like to pick varieties labeled disease-resistant (or at least “rust resistant”) for fewer headaches.
When to plant
Green beans are warm-season seeds. They germinate best when the soil is warm and stay healthier early on.
- Best soil temperature: around 70 to 80°F
- Minimum soil temperature: about 60°F (germination slows and problems increase)
- Frost: beans are not frost tolerant, so plant after your last frost date
If you do not have a soil thermometer, use this practical rule: wait until nights are consistently staying above 50°F and your garden soil is not cold and soggy in the morning.
Should you soak bean seeds? I do not. Overnight soaking can crack seeds or encourage rotting in cool, wet soil. Fresh seed plus warm soil works better.
For continuous harvest, you can plant a small new row every 2 to 3 weeks (especially for bush beans). If you live where summer heat is intense, it is normal to pause during the hottest stretch and then plant again in late summer for a fall crop if you have time before frost.
Where to plant
Sun
Aim for 6 to 8+ hours of sun. Beans will grow in less, but you will usually get fewer flowers and smaller harvests.
Soil and drainage
Beans are not overly picky, but they do poorly in waterlogged soil. The sweet spot is soil that drains well and has steady moisture.
- Best texture: loose, crumbly soil that you can dig easily
- pH range: roughly 6.0 to 7.0 is a good target for most home gardens
- Compost: mix in a couple inches if your soil is sandy, tight, or low in organic matter
Skip heavy fertilizer early on. Beans partner with soil microbes and can fix nitrogen from the air, so too much nitrogen often leads to big leafy plants and fewer beans.
Optional: If this is a brand-new bed that has never grown beans or peas, a dusting of bean inoculant can help, but it is not required in most home gardens.
How to plant (step by step)
You can direct sow beans right where they will grow. They generally do not love transplanting because their roots are easy to disturb.
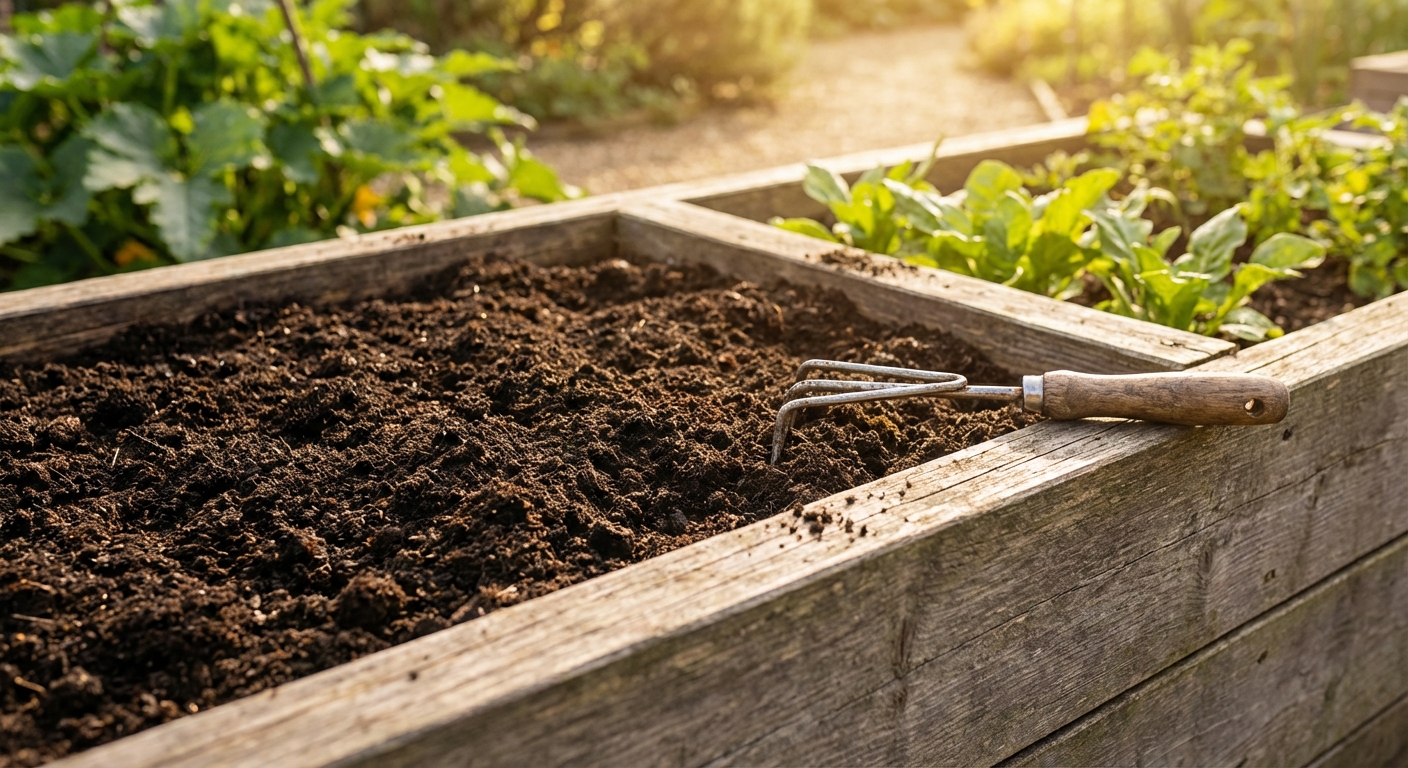
1) Prep the bed
- Pull weeds and break up the top few inches of soil.
- If the soil is dry, water lightly first so the seed zone is evenly moist.
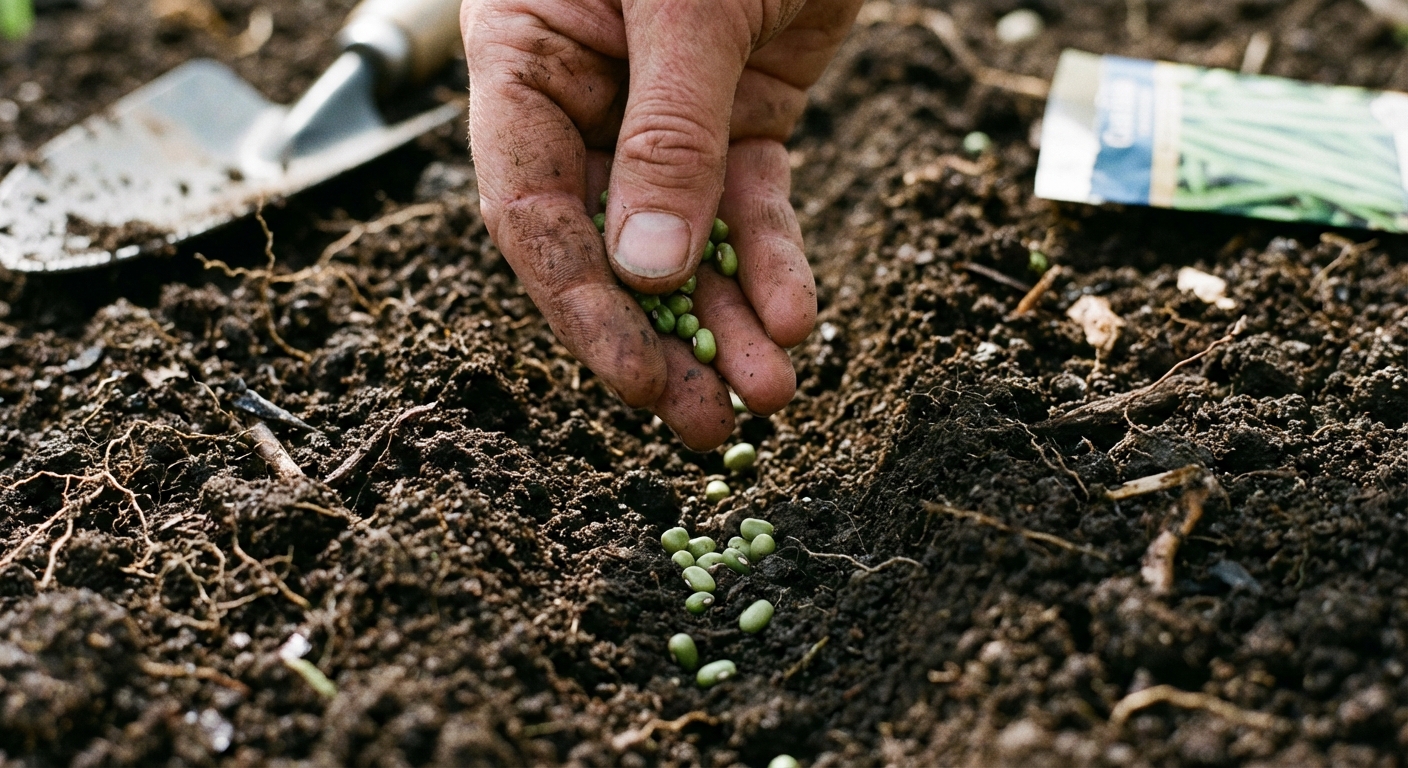
2) Plant depth
Plant seeds about 1 inch deep. In very sandy soil, you can go a touch deeper. In heavy clay, stay closer to 3/4 inch.
3) Spacing
- Bush beans (rows): 2 to 4 inches apart, with rows about 18 to 24 inches apart
- Bush beans (raised beds): you do not need wide rows. Space plants 4 to 6 inches apart in a simple grid (all directions).
- Pole beans: 6 inches apart is a safe default along a trellis (you can go a little closer in rich soil, but airflow matters)
If you tend to get patchy germination, plant a little thicker, then thin later by snipping extras at soil level.
4) Watering after planting
Water gently so you do not wash seeds out of place. Keep the top inch of soil consistently moist until sprouting, but not soggy.
Beginner cue: I aim for soil that feels like a wrung-out sponge. Damp when you pinch it, but no water dripping.
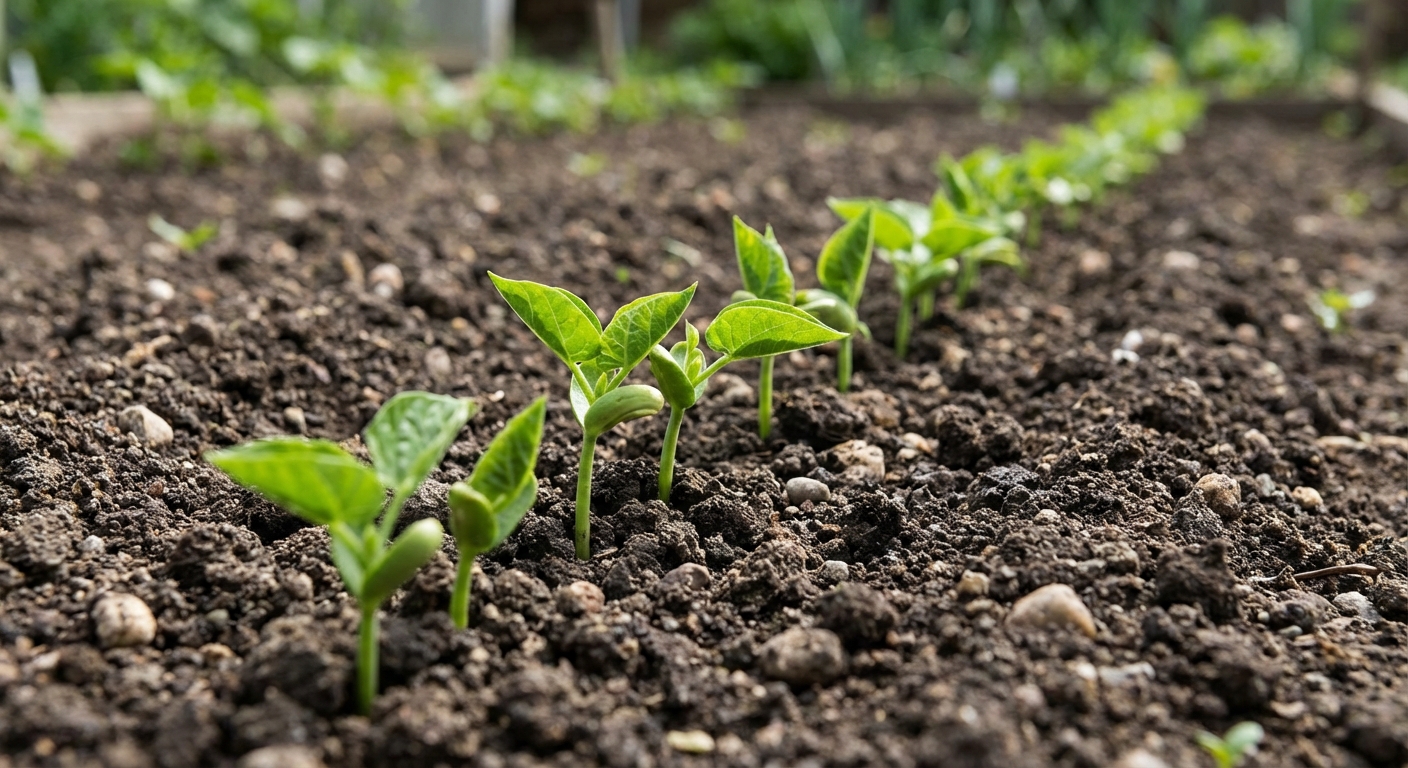
5) Expected germination time
In warm soil, beans often sprout in 5 to 10 days. Cooler conditions can push it closer to two weeks. If nothing shows by day 10 to 14 and the soil has been cool, I re-seed the gaps.
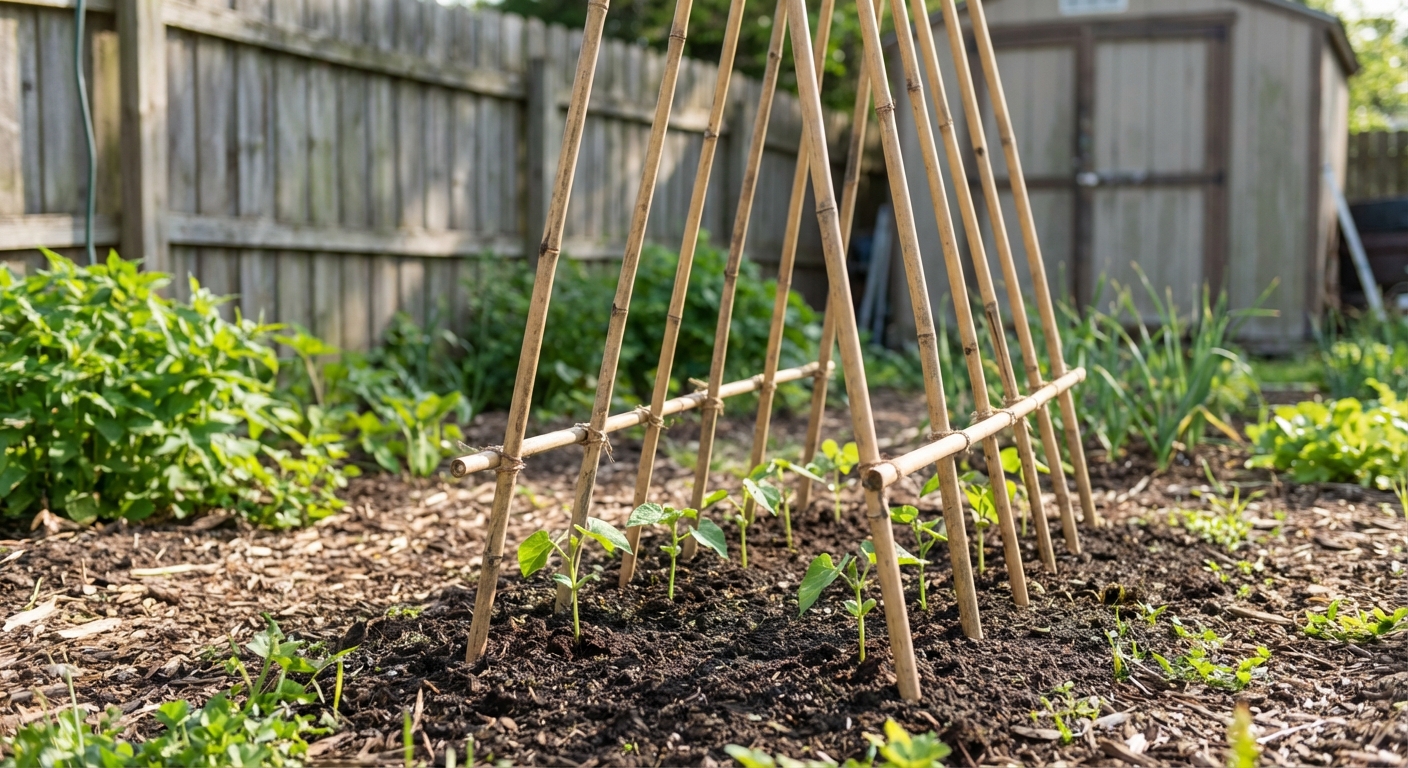
Trellis for pole beans
Pole beans need support early, ideally installed at planting time so you do not disturb roots later.
- Garden netting on stakes: quick and works well
- Cattle panel or wire fencing: sturdy and long-lasting
- Teepee with bamboo poles: great for small spaces and kids' gardens
Once vines reach 6 to 10 inches, gently guide them toward the support. After they grab on, they usually handle the rest.
Containers
You can grow green beans in containers as long as you give them enough soil volume and consistent water.
Container basics
- Pot size: at least 10 to 12 inches deep for bush beans, larger is better
- Drainage: must have drainage holes
- Potting mix: use a quality vegetable potting mix, not heavy garden soil
Spacing in pots
- Bush beans: a good rule of thumb is about 1 plant per gallon of pot size. In a 5-gallon container, aim for 3 to 5 plants depending on the variety and the container width.
- Pole beans: fewer plants per pot (often 2 to 3 in a 5-gallon) plus a strong trellis anchored well
Container beans dry out faster than in-ground beans. Check moisture daily once plants start flowering.
Starting indoors
Most of the time, I recommend direct sowing. It is simpler and usually gives sturdier plants.
That said, if your growing season is short, you can start beans indoors carefully.
- Use biodegradable pots or larger cells to reduce root disturbance.
- Start only 2 to 3 weeks before planting outside.
- Harden off seedlings for several days before transplanting.
If you transplant and growth stalls, that is usually transplant shock. Direct sowing avoids that problem.
Common problems
Seeds did not sprout
- Likely cause: soil too cold or too wet
- Fix: replant when soil is warmer, improve drainage, avoid overwatering
Seeds sprouted, then seedlings disappeared
- Likely cause: birds, cutworms, or slugs
- Fix: use bird netting for the first week if birds are pecking seedlings. For cutworms, use a simple collar (paper cup or cardboard ring) pushed into the soil around each seedling, clear plant debris, and check at night. For slugs, hand-pick at dusk or use traps.
Patchy germination
- Likely cause: uneven moisture or planting depth
- Fix: water more evenly, re-seed gaps, and aim for a consistent 1-inch planting depth
Lots of leaves, few beans
- Likely cause: too much nitrogen, too much shade, or heat stress during flowering
- Fix: skip high-nitrogen fertilizer, increase sun if possible, keep soil evenly moist during flowering
Flowers drop off
- Likely cause: hot, dry weather or inconsistent watering (sustained highs in the 90s°F can do it)
- Fix: deep water in the morning, mulch to hold moisture, harvest regularly to keep plants producing. In extreme heat, focus on keeping plants alive and expect better pod set when temperatures ease.
Leaf spots and rust
- Likely cause: wet leaves, tight spacing, poor airflow
- Fix: water at the base, give plants a little more spacing, and avoid overhead watering late in the day. Remove the worst leaves if needed so plants dry faster.
Care after sprouting
Watering
Beans like steady moisture, especially once they start flowering and setting pods. Water at the base when possible to keep leaves drier and reduce disease.
Quick check: after you water, dig down 2 to 3 inches. It should be damp there, not powder-dry and not muddy.
Mulch
A thin layer of straw or shredded leaves helps hold moisture and cuts down weeds. Keep mulch a little back from the stems to avoid trapping too much moisture right at the base.
Fertilizer
If you mixed in compost, you might not need anything else. If plants look pale and growth is slow, a light feeding with a balanced vegetable fertilizer is usually plenty. Avoid pushing nitrogen.
Days to harvest
Most bush beans are ready in about 50 to 65 days. Pole beans are often 60 to 75+ days, depending on the variety and growing conditions.
Harvesting tips
Pick pods while they are still tender. A simple test is the snap test: if the pod snaps cleanly instead of bending like a rope, it is usually in the sweet spot. The more you harvest, the more the plant produces. If pods get overmature, the plant often slows down.
Quick checklist
- Plant after last frost, when soil is 60°F or warmer (70 to 80°F is even better).
- Full sun is best.
- Plant seeds about 1 inch deep.
- Space bush beans 2 to 4 inches apart in rows, or 4 to 6 inches apart in a raised-bed grid.
- Give pole beans a trellis and space plants about 6 inches apart along it.
- Keep soil evenly moist until sprouting.
- Harvest often for a longer season.
If you want, tell me whether you are growing bush or pole beans and whether you are planting in-ground, a raised bed, or containers. I can suggest a simple spacing plan that fits your space.

Jose Britto
I’m Jose Britto, the writer behind Green Beans N More. I share practical, down-to-earth gardening advice for home growers—whether you’re starting your first raised bed, troubleshooting pests, improving soil, or figuring out what to plant next. My focus is simple: clear tips you can actually use, realistic expectations, and methods that work in real backyards (not just in perfect conditions). If you like straightforward guidance and learning as you go, you’re in the right place.