Pickled green beans are one of those “why didn’t I do this sooner?” pantry staples. They are snappy, tangy, and easy to customize with garlic, dill, and a little heat. The big goal is simple: keep the beans crisp while getting a brine that is flavorful and safe.
Below you will find two solid options: a quick refrigerator pickle (fast and forgiving) and a water bath canned version for shelf storage. I will also share the small details that make the difference between crunchy dilly beans and sad, floppy ones.
What makes great pickled green beans?
- Fresh, firm beans (not older beans that have gone rubbery in the fridge).
- Correct vinegar strength for canning: use vinegar labeled 5% acidity (white or apple cider vinegar both work).
- Hot brine, tight packing, and minimal over-processing to protect texture.
- Time: flavor improves after a few days in the fridge or a couple weeks after canning.
Pickling options
Refrigerator pickled green beans
Best if you want results this week. No special equipment beyond clean jars and a pot for the brine. These must stay refrigerated and are best for quality within 4 to 6 weeks (often fine longer if kept cold and clean, but crunch and flavor slowly fade).
Water bath canned pickled green beans
Best if you want shelf-stable jars. This method relies on a tested formulation and proper processing. Once sealed, store in a cool, dark place for up to 1 year for best quality.
Before you start
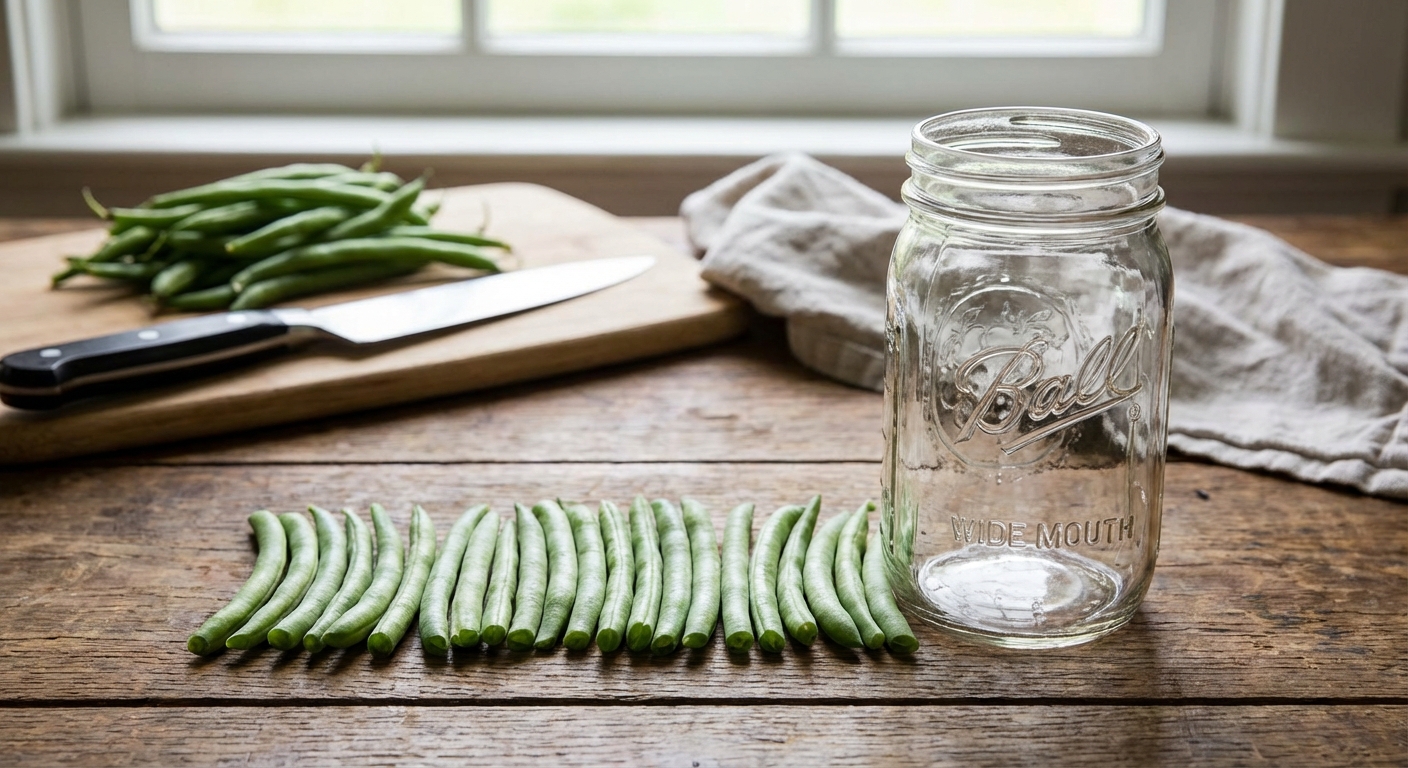
- Pick size: slender beans (about pencil-thick) stay crisper than thick, mature pods.
- Use them fast: try to pickle within 24 hours of harvest for best snap.
- Wash well: rinse and drain. Trim stem ends. Leave whole or cut to fit jars.
- Trim to fit the jar: for upright beans, trim to the shoulder of the jar, or about 3/4 to 1 inch below the rim. This helps keep the tips fully submerged once you add brine and headspace.
- Salt note: pickling salt is easiest. If you use kosher salt, brands vary a lot. If you can, measure by weight for consistent saltiness.
Refrigerator pickled green beans
Ingredients (for about 2 pint jars)
- About 1 pound fresh green beans, trimmed (yield depends on bean size and how tight you pack)
- 1 cup white vinegar (5% acidity)
- 1 cup water
- 1 tablespoon pickling salt (or kosher salt, ideally measured by weight)
- 2 to 4 garlic cloves
- 2 to 4 dill sprigs (or 1 to 2 teaspoons dill seed)
- 1/2 teaspoon mustard seed (optional)
- 1/2 teaspoon black peppercorns (optional)
- Pinch of red pepper flakes or 1 small chile (optional)
Steps
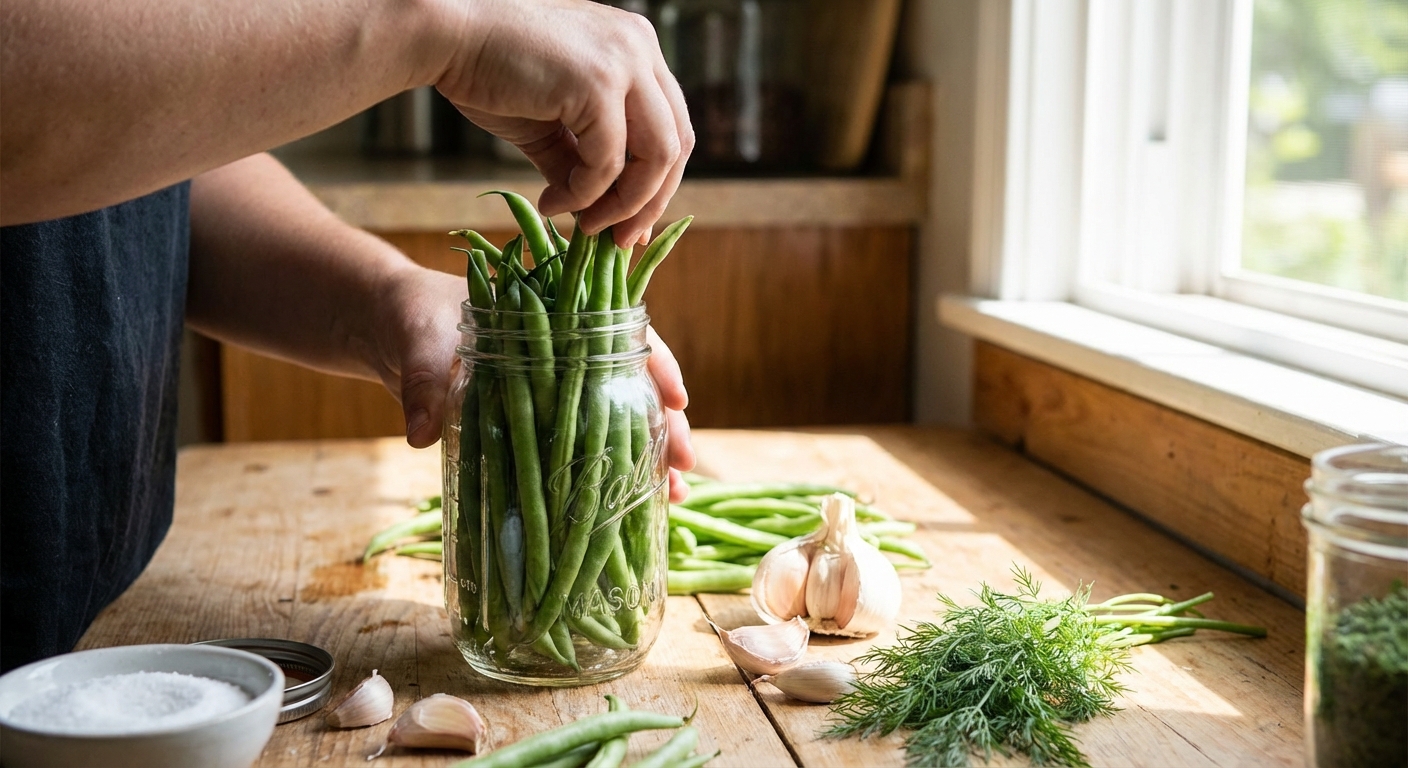
- Pack jars: Add garlic, dill, and spices. Pack beans upright, snug but not crushed.
- Make brine: Bring vinegar, water, and salt just to a boil, stirring to dissolve salt.
- Pour: Carefully pour hot brine over beans, covering them fully. Leave about 1/2 inch headspace.
- Cool and chill: Let jars cool to room temperature, then refrigerate.
- Wait for flavor: Good after 24 hours, better after 3 to 7 days.
Storage: Keep refrigerated. Refrigeration keeps these safe from botulism growth, but spoilage can still happen. Discard at any sign of mold, off odors, sliminess, or fizzing. When in doubt, throw it out.
Water bath canned dilly beans
If you want shelf-stable jars, stick to a tested recipe and do not improvise the vinegar-to-water ratio. The formulation and processing below matches the style of tested “Dilly Beans” recipes from trusted canning sources such as the National Center for Home Food Preservation (NCHFP) and Ball. Always use 5% acidity vinegar (4% is not acceptable).
Jar size: This is written for pint jars. Quart jars are not typically recommended for dilly beans in tested water bath canning recipes, so do not size up unless you are following a tested quart-specific recipe.
What you need
- Canning pot or large stockpot with a rack
- Pint jars with new lids and bands
- Jar lifter, funnel, and a clean towel
Ingredients (makes about 4 pints)
- About 2 pounds green beans, trimmed to fit pint jars
- 2 1/2 cups white vinegar (5% acidity)
- 2 1/2 cups water
- 2 1/2 tablespoons pickling salt
- 1 to 2 garlic cloves per jar
- 1 dill sprig per jar (or 1/2 teaspoon dill seed per jar)
- Optional per jar: 1/4 teaspoon mustard seed, a few peppercorns, a pinch of red pepper flakes
Brine volume note: Packing styles vary. Beginners often pack a little looser, which needs more liquid. This slightly larger brine batch gives you breathing room. If you still run short, make a second small batch using the same ratio.
Step-by-step
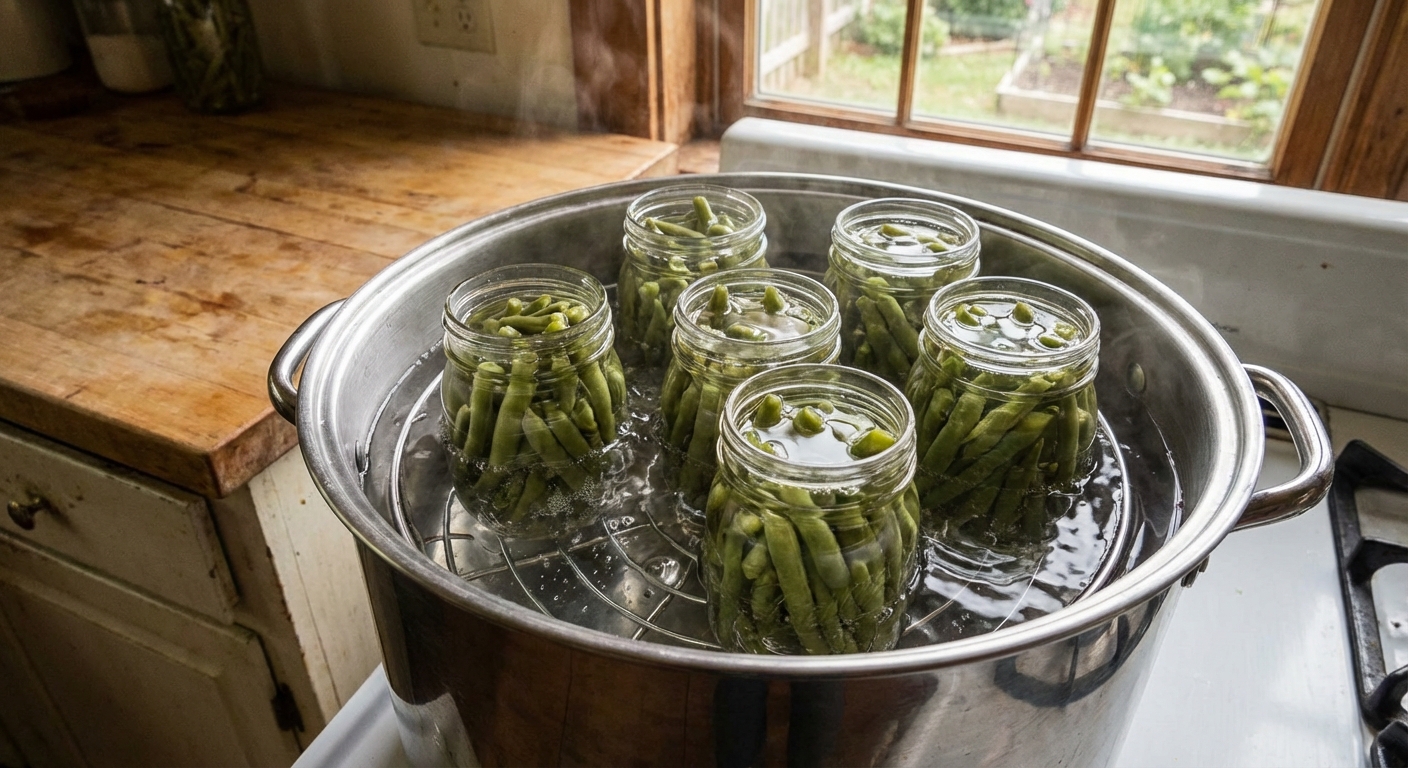
- Prep the canner: Fill with water and start heating so it is ready when jars go in. You want jars covered by 1 to 2 inches of water during processing.
- Clean and heat jars: Wash jars, lids, and bands. Keep jars hot (simmering water or dishwasher hot cycle). With processing times of 10 minutes or more, pre-sterilizing jars is not typically required, but jars must be clean and hot.
- Make the brine: Bring vinegar, water, and salt to a boil.
- Pack jars: Add garlic, dill, and spices to each hot jar. Pack beans upright.
- Add brine: Pour hot brine over beans, leaving 1/2 inch headspace. Make sure the beans are fully covered by brine.
- Remove bubbles: Slide a clean chopstick or bubble tool down the sides. Top off brine if needed to maintain headspace.
- Wipe rims: Wipe jar rims clean so lids seal well.
- Lid and band: Apply lid and screw band on fingertip-tight.
- Process: Place jars on the rack in boiling water. Once the water returns to a full boil, process pint jars based on your altitude (see table).
- Cool: Turn off heat, remove lid from canner, and let jars rest 5 minutes. Remove jars and cool undisturbed 12 to 24 hours. Check seals, label, then store.
Processing time for pint jars
- 0 to 1,000 ft: 10 minutes
- 1,001 to 6,000 ft: 15 minutes
- Above 6,000 ft: 20 minutes
Reminder: Do not change the vinegar and water ratio, do not add oil, and do not thicken the brine. If you want extra add-ins like onion or carrot, keep them minimal and stick to tested-style variations.
How to keep them crunchy
- Start with fresh beans: older beans soften no matter what you do.
- Do not over-process: in canning, extra minutes can mean softer beans.
- Pack tight: loose beans float and the tips can discolor if they sit above brine.
- Trim to the shoulder: gives you room for headspace and helps keep beans submerged.
- Consider a crisping aid: calcium chloride (often sold as Pickle Crisp) can help. Follow the product directions.
Flavor variations
Once you have the basic method down, you can tweak the jar add-ins without messing with the vinegar-to-water ratio.
Classic garlic dill
- Garlic + dill seed + peppercorns
Spicy dilly beans
- 1 small hot pepper per jar or 1/4 teaspoon red pepper flakes
- Add a pinch of smoked paprika for a warmer flavor
Sweet and tangy
- Add 1 to 2 tablespoons sugar to the brine (do not reduce vinegar)
Garden pickles
- Add a few onion slices or a couple carrot sticks to each jar and keep packing tight
Common problems
My beans turned out soft
- Beans were over-mature or not super fresh.
- They were processed too long, or sat in a still-hot canner after processing.
- Try thinner beans next time and stick to the recommended processing time for your altitude.
My brine is cloudy
- This is often from iodized table salt or minerals in hard water.
- Use pickling salt and filtered water next batch.
The beans are floating
- Pack more tightly and leave proper headspace.
- Floating happens sometimes, but beans should stay covered by brine for best quality.
A jar did not seal
- Refrigerate and eat first, or reprocess within 24 hours using a new lid.
- Check that rims were wiped clean and beans were not trapped under the rim.
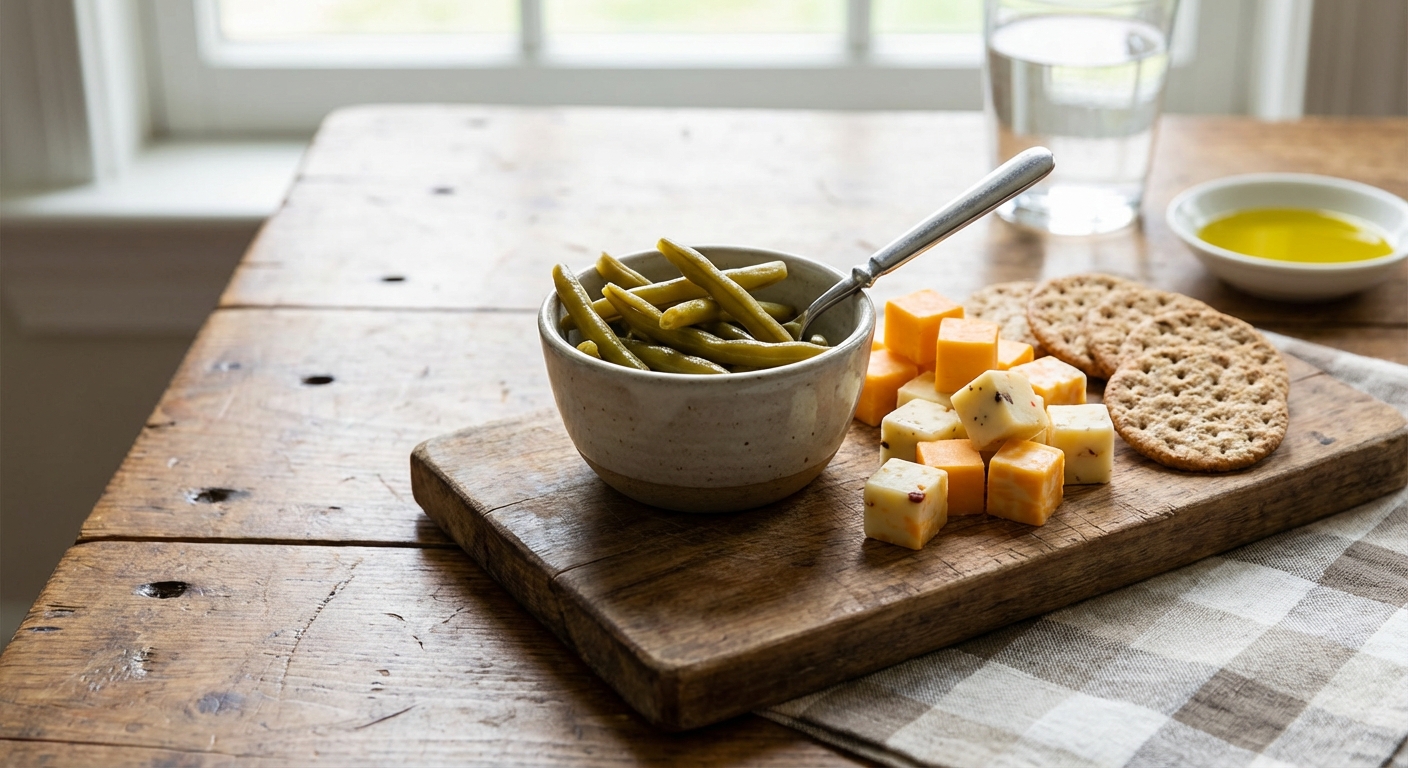
How to serve
- Snack straight from the jar (my favorite “garden pantry” move).
- Add to a relish tray with cheese and crackers.
- Chop into potato salad or tuna salad for crunch.
- Use as a Bloody Mary garnish if you are into that kind of thing.
Quick safety notes
- Use 5% acidity vinegar for canning. Do not use 4% vinegar.
- Do not change the vinegar-to-water ratio in the canning brine.
- Do not add oil to jars or brine for water bath canning.
- Use pint jars unless you are following a tested quart recipe.
- Use proper headspace and process for your altitude.
- When in doubt, refrigerate: if you are unsure about a jar, store it in the fridge and eat it sooner.
My first batch tip
If you are new to this, start with refrigerator pickled green beans. It teaches you packing, brine flavor, and what “right” looks like with almost no risk of wasting a full canning day. Once you love the flavor, move up to water bath canning so you can stock the pantry.
When you make your first batch, keep notes. Bean variety, thickness, how tight you packed, and how long they sat before pickling all affect crunch. Real backyards are not perfect, but good pickles are totally doable.

Jose Brito
I’m Jose Britto, the writer behind Green Beans N More. I share practical, down-to-earth gardening advice for home growers—whether you’re starting your first raised bed, troubleshooting pests, improving soil, or figuring out what to plant next. My focus is simple: clear tips you can actually use, realistic expectations, and methods that work in real backyards (not just in perfect conditions). If you like straightforward guidance and learning as you go, you’re in the right place.