Canning green beans is one of those projects that feels old-fashioned in the best way. You put in some work now, and later you open a jar that tastes like you planned ahead on purpose.
But green beans are a low-acid food, which means they must be canned with a pressure canner for safety. A boiling water bath is not hot enough to make them shelf-stable.
Pressure canning vs water bath
Green beans can carry spores that survive boiling temperatures. A pressure canner reaches the higher heat needed to make low-acid foods safe for long-term storage.
- Do: Use a pressure canner and follow tested processing times.
- Do not: Water-bath can green beans, oven can them, or “just add vinegar” and hope for the best.
Vinegar note: Only tested pickled bean recipes are designed for water-bath canning. Plain beans in water are pressure canner territory.
If you are new to pressure canning, do not let it intimidate you. Once you run through one batch, it becomes a repeatable routine.
What you need
Equipment
- Pressure canner (dial gauge or weighted gauge)
- Canning jars (pints or quarts), new lids, and bands
- Jar lifter, canning funnel, bubble remover or nonmetallic spatula
- Large pot or kettle for hot water
- Clean towels and a timer
Ingredients
- Fresh green beans
- Water (hot)
- Canning salt (optional, for flavor only)
Salt note: You can skip salt entirely and the jars will still be safe. If you use it, stick to canning salt for best clarity and fewer deposits.
Before you start
- Check jars: Do not use jars with cracks, chips, or nicks on the rim.
- Use new lids: Do not reuse single-use canning lids.
- Dial gauge check: If you have a dial-gauge canner, get the gauge tested regularly (often annually) through your local extension office or per your manufacturer.
- Use the rack: Jars must sit on the canner rack, not directly on the canner bottom.
Raw pack or hot pack
Both methods are safe when processed correctly. The difference is mostly texture, jar appearance, and how much the beans shrink in the jar.
- Raw pack: Put raw beans into jars, then cover with boiling water. Faster prep, but beans shrink more and you can end up with more floating.
- Hot pack: Briefly heat beans first, then pack hot into jars. Takes a bit longer but usually gives better pack density and more even liquid levels.
Good to know: The processing times are the same for raw-pack and hot-pack green beans.
If you are canning for the first time, I lean toward hot pack. It is forgiving and tends to look nicer on the shelf.
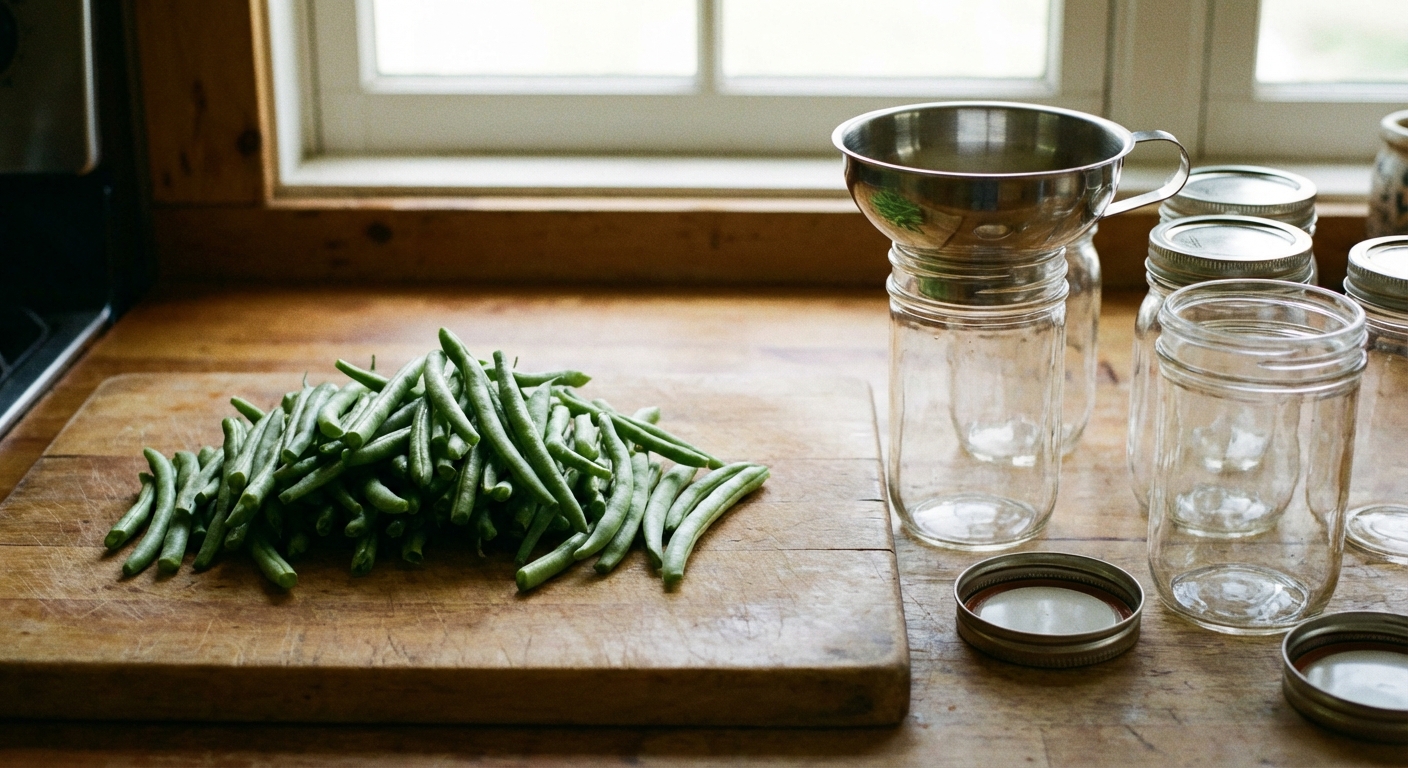
Prep the beans
- Pick and sort: Choose crisp, tender beans. Avoid tough, overgrown pods for canning. They stay tough.
- Wash well: Rinse under cool water and drain.
- Trim: Snap or cut off ends. Leave whole, cut in half, or cut into 1-inch pieces.
Realistic expectation: Canned green beans will not stay “fresh sauté” crisp. You are aiming for a good, tender bean that holds its shape and tastes clean.
How to pressure can green beans
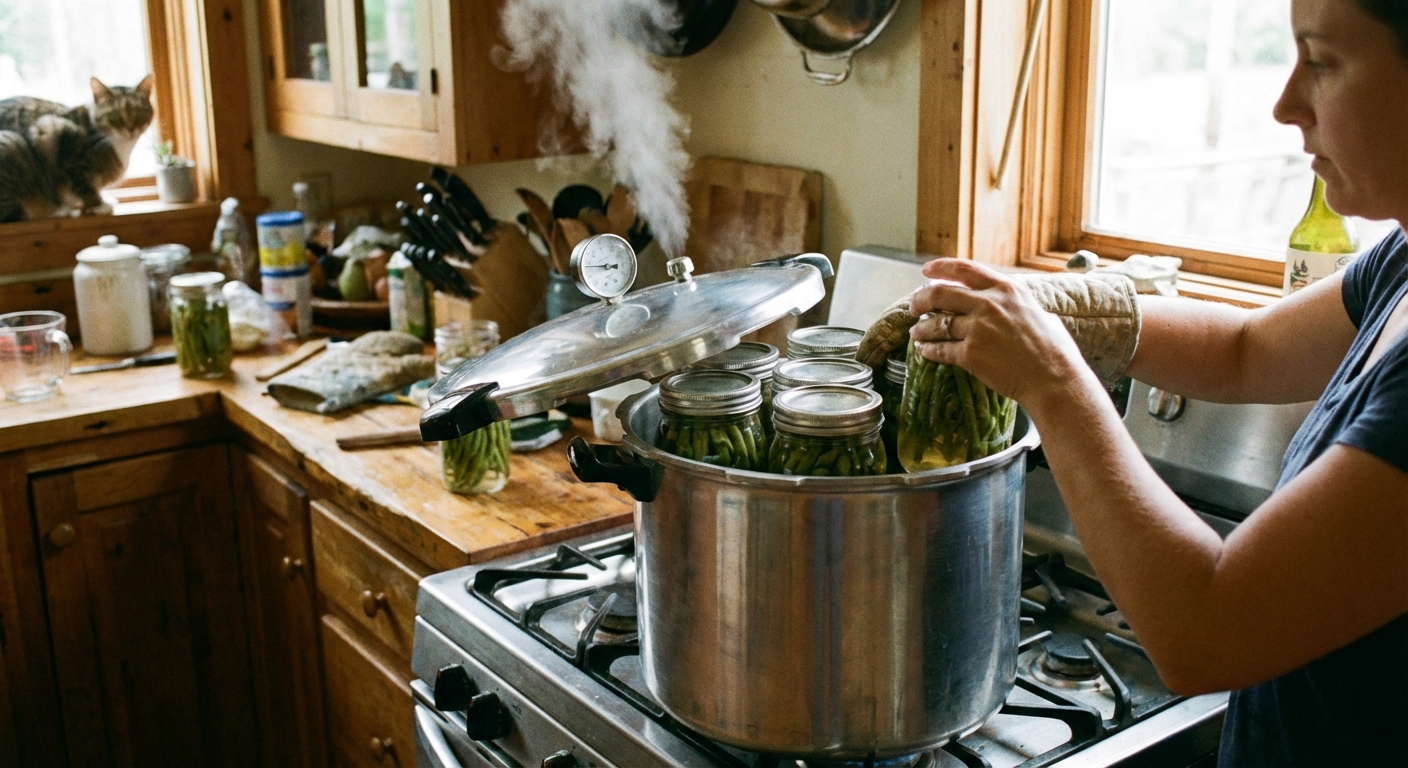
1) Heat jars and preheat the canner
Wash jars, lids, and bands. Keep jars hot until filling (a simmering pot of water works). You are keeping them warm, not boiling them, so they do not crack from thermal shock. Follow your lid manufacturer’s directions for preparing lids.
Add the amount of water your pressure canner manual calls for, commonly 2 to 3 inches. Place the rack in the canner. Bring the water to a gentle simmer so the canner is ready when your jars are filled.
2) Hot pack or raw pack
Hot pack: Simmer or boil beans in water for 5 minutes. Drain, and keep the cooking liquid hot (or use fresh boiling water) for filling jars.
Raw pack: Skip the pre-cook and move straight to packing jars with raw beans.
3) Fill jars
Pack beans into hot jars.
- Headspace: Leave 1 inch at the top.
- Salt (optional): 1/2 teaspoon per pint, 1 teaspoon per quart.
Pour in boiling water (or hot cooking liquid), keeping 1 inch headspace.
4) Remove bubbles, wipe rims, apply lids
Slide a bubble remover down the inside of the jar to release trapped air. Recheck headspace and top off with hot liquid if needed. Wipe the rim with a clean damp cloth, then place the lid and screw band on fingertip tight.
5) Load the canner
Place jars upright on the canner rack. Lock the lid. Leave the weight off (or open the petcock) so the canner can vent.
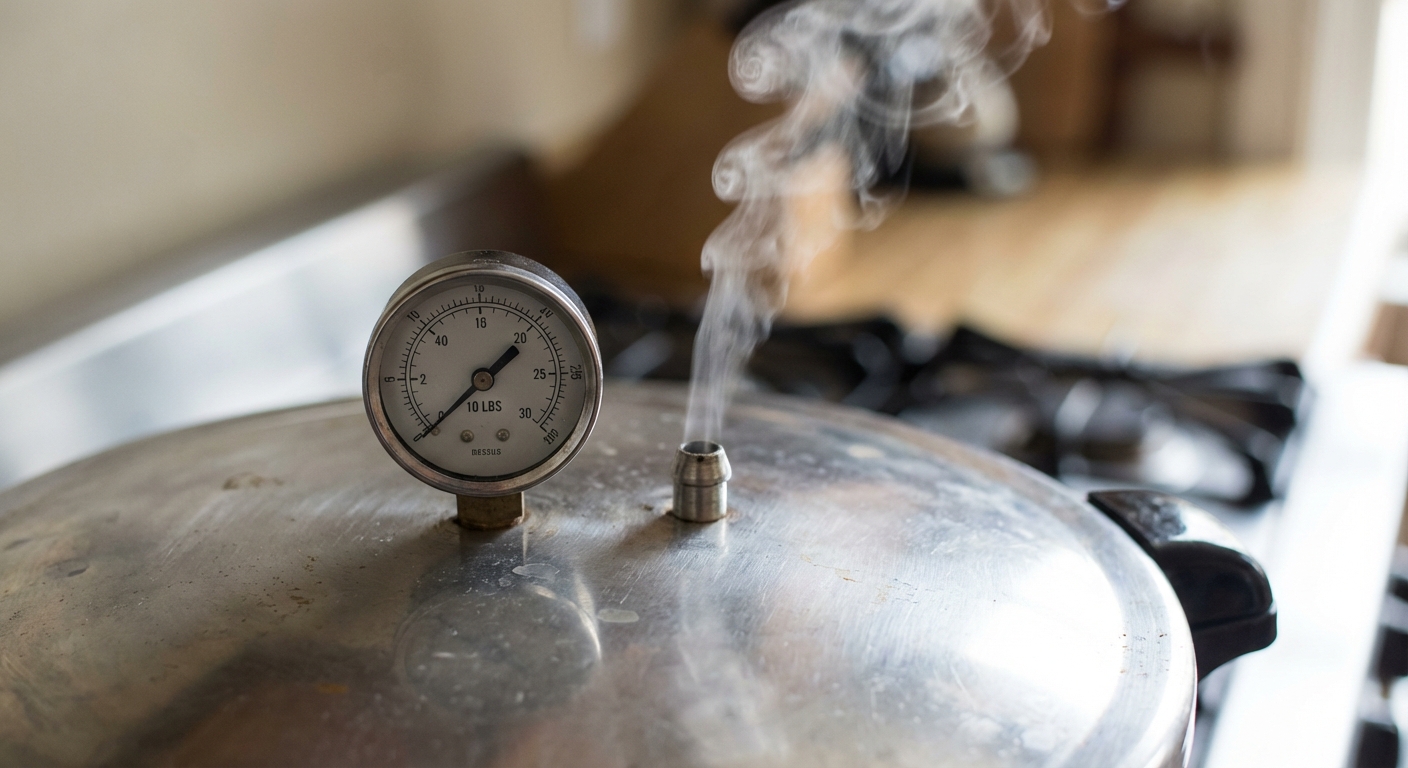
6) Vent for 10 minutes
Once you have a strong, steady stream of steam, vent for 10 minutes. This step matters for accurate temperature inside the canner.
7) Pressurize and process
Add the weight or close the petcock, bring the canner up to pressure, then start timing only when the correct pressure is reached.
8) Cool down naturally
When time is up, turn off the heat and let the canner cool on its own. Do not force cool with cold water or by lifting the weight. When pressure returns to zero (or the canner indicates it is fully depressurized), wait 5 to 10 minutes, then open the lid away from your face.
9) Rest jars and check seals
Lift jars straight up and set on a towel. Leave undisturbed for 12 to 24 hours. Then remove bands, check seals, label, and store in a cool, dark place.
Processing time and pressure
These are the standard tested times for plain green beans in water using pints or quarts.
- Pints: 20 minutes
- Quarts: 25 minutes
Pressure by altitude
Use the pressure and altitude table from the USDA, NCHFP, your local extension office, or your canner manual. The numbers below match common USDA-style guidance for canning green beans, but always defer to the tested table for your canner and elevation.
Dial gauge canner
- 0 to 2,000 ft: 11 PSI
- 2,001 to 4,000 ft: 12 PSI
- 4,001 to 6,000 ft: 13 PSI
- 6,001 to 8,000 ft: 14 PSI
- 8,001 to 10,000 ft: 15 PSI
Weighted gauge canner
- 0 to 1,000 ft: 10 PSI
- Above 1,000 ft: 15 PSI
Altitude reminder: If you are not sure of your elevation, look it up before canning. Under-processing is the risk. Over-processing mostly impacts texture.
How many beans do you need?
It varies by bean size and how tightly you pack, but here is a useful ballpark.
- About 2 pounds of beans per quart jar
- About 1 pound of beans per pint jar
Yield note: This is approximate. Your results can swing depending on bean size, how they are cut, and whether you raw pack or hot pack.
If you are harvesting from the garden a little at a time, you can refrigerate beans for a day or two until you have enough for a full canner load. Just keep them dry and crisp.
Common mistakes
- Skipping venting: Always vent for 10 minutes before pressurizing.
- Over-tightening bands: Fingertip tight helps prevent buckled lids and siphoning.
- Letting pressure swing: Big dips can affect processing. Keep it steady.
- Forcing a fast cool-down: This often causes liquid loss and seal failures.
- Packing old, tough beans: Canning will not make them tender. Start with good pods.
- Skipping the rack: Jars should never sit directly on the canner bottom.
Troubleshooting
Liquid siphoned out
Liquid loss is usually caused by pressure changes, opening the canner too quickly, overfilling jars, or bands being too tight. If the jar sealed, it is often still usable, but any beans above the liquid may darken and the texture can suffer.
What to do: If liquid loss is substantial, set that jar aside and use it first. Once opened, refrigerate and use promptly. If a jar did not seal, refrigerate and use within a few days or reprocess within 24 hours using a new lid and the full processing time.
Beans are floating
Floating is common with raw pack, young beans, or looser packing. Hot pack helps. It is usually a quality issue, not a safety issue, as long as the jars sealed and were processed correctly.
Liquid is cloudy
Cloudiness can come from minerals in water, starches from mature beans, or using regular table salt. It is usually harmless if your process was correct and jars sealed.
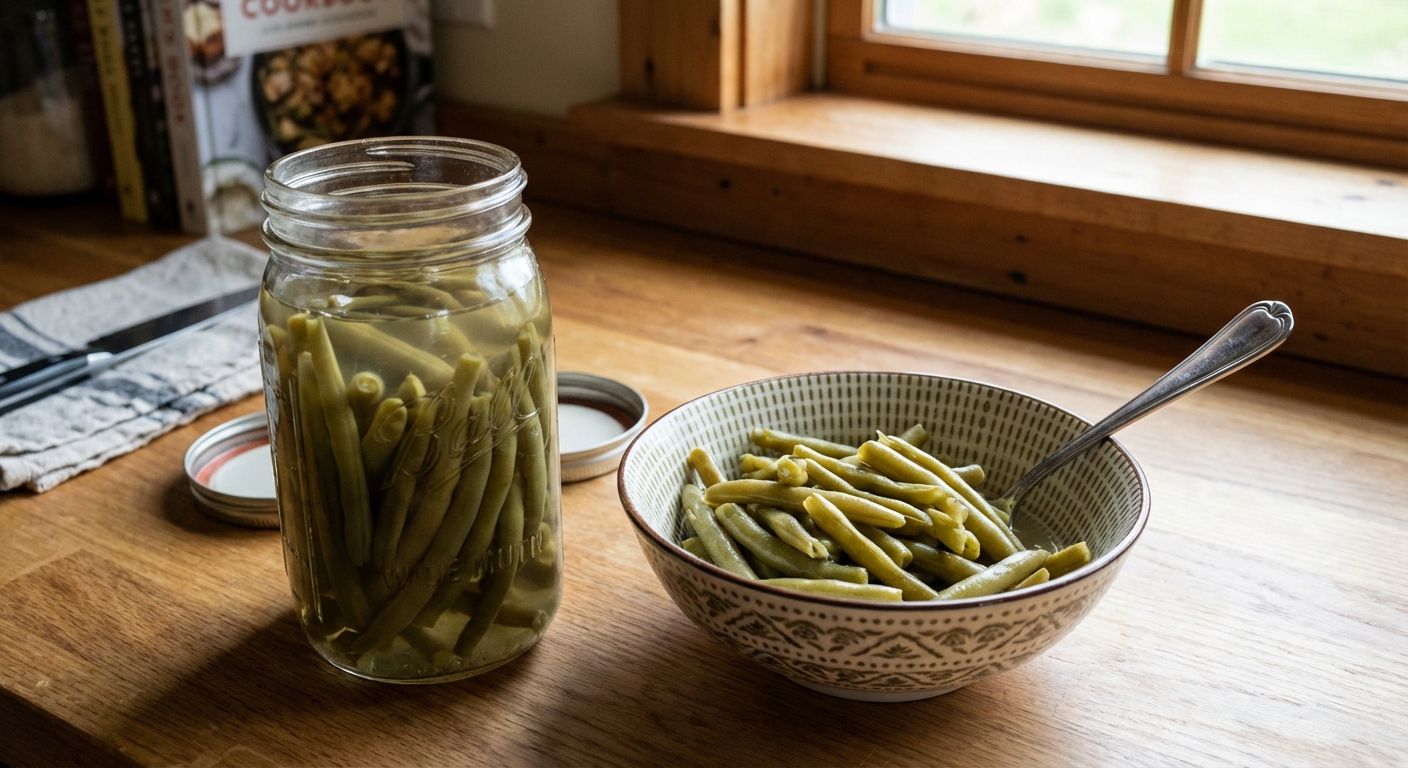
Storing and using
Store sealed jars without bands in a cool, dark place. A steady, cool pantry is ideal (around 50 to 70°F if you can manage it). Avoid storing near heat sources, in direct sun, or where jars can freeze.
Safety note: If a jar unseals in storage or you notice leaking, bulging lids, spurting liquid, mold, or off odors, discard the jar. Do not taste to “check.” When in doubt, throw it out.
To serve, heat and season. Canned beans love:
- Butter and black pepper
- Bacon drippings and a splash of vinegar
- Garlic, onion, and a pinch of red pepper flakes
Quick checklist
- Pressure canner only, no water bath
- Use fresh, tender beans and sound jars
- 1 inch headspace
- Jars on the rack, not the canner bottom
- Vent 10 minutes
- Process: 20 min pints, 25 min quarts
- Use the correct PSI for your altitude and canner type
- Cool naturally, then rest jars 12 to 24 hours
FAQ
Can I add onion, garlic, or bacon to the jars?
For safety, stick to tested recipes when adding ingredients. Plain beans in water are straightforward. If you want flavor, it is safest to add it when you open the jar.
Do I have to pressure can right after picking?
No, but quality is best when beans are canned soon after harvest. If you need time, refrigerate them briefly and keep them from drying out.
What if a jar did not seal?
Refrigerate and use within a few days, or reprocess within 24 hours using a new lid and full processing time. Make sure you still have correct headspace and clean jar rims.

Jose Brito
I’m Jose Britto, the writer behind Green Beans N More. I share practical, down-to-earth gardening advice for home growers—whether you’re starting your first raised bed, troubleshooting pests, improving soil, or figuring out what to plant next. My focus is simple: clear tips you can actually use, realistic expectations, and methods that work in real backyards (not just in perfect conditions). If you like straightforward guidance and learning as you go, you’re in the right place.