Pole beans are one of my favorite “work smarter” crops. Give them something sturdy to climb, keep them watered, and they will turn a small footprint into a long season of harvests. They also handle summer heat better than a lot of cool-weather veggies, though very high heat can still make them pause or drop blossoms for a bit.
Below is the practical, no-fuss approach I use and recommend, from choosing a trellis that will not collapse to getting better germination and fewer pest headaches.
Pole beans vs bush beans
Both types are easy, but they behave differently. Picking the right one up front saves frustration later.
- Pole beans grow tall (often 6 to 10 feet), need support, and usually produce over a longer stretch once they get going.
- Bush beans stay compact, do not need support, and tend to produce in a heavier, shorter flush.
If you have limited space, want a longer harvest window, or like vertical gardening, pole beans are a great fit. If you want a fast, simple crop with minimal setup, bush beans win.
Best conditions for pole beans
Temperature and timing
Pole beans are warm-season plants. The biggest beginner mistake is planting too early.
- Plant after your last frost date and when soil has warmed up (at least 60°F, ideally 60 to 65°F or warmer for faster germination).
- If nights are still chilly, wait. Cold soil can rot seeds or stall them for weeks.
Sun
Aim for full sun (at least 6 hours, 8 is even better). They will survive in lighter sun, but you will usually see fewer flowers and fewer pods.
Soil
They are not super picky, but they do best in soil that drains well and has decent organic matter.
- Target a soil pH around 6.0 to 7.0.
- Mix in compost before planting. Avoid going heavy on high-nitrogen fertilizer.
Too much nitrogen gives you gorgeous vines and leaves and not enough pods. If your beans look like a jungle but are not flowering well, nitrogen is often the reason.
Choosing varieties
You will see pole beans sold as snap beans (green beans), wax beans (yellow), and shelling or dry beans. Pick based on how you actually cook.
- Snap pole beans: classic tender pods for fresh eating.
- Romano types: wider, flatter pods with great flavor and texture.
- Yardlong types: long pods; love heat, great if your summers run hot.
- Scarlet runner beans: edible beans and beautiful flowers, but they can be less productive in extreme heat.
One practical tip: if you struggle with pests or disease, rotate varieties year to year and avoid planting beans in the same spot every season.
Trellis and support
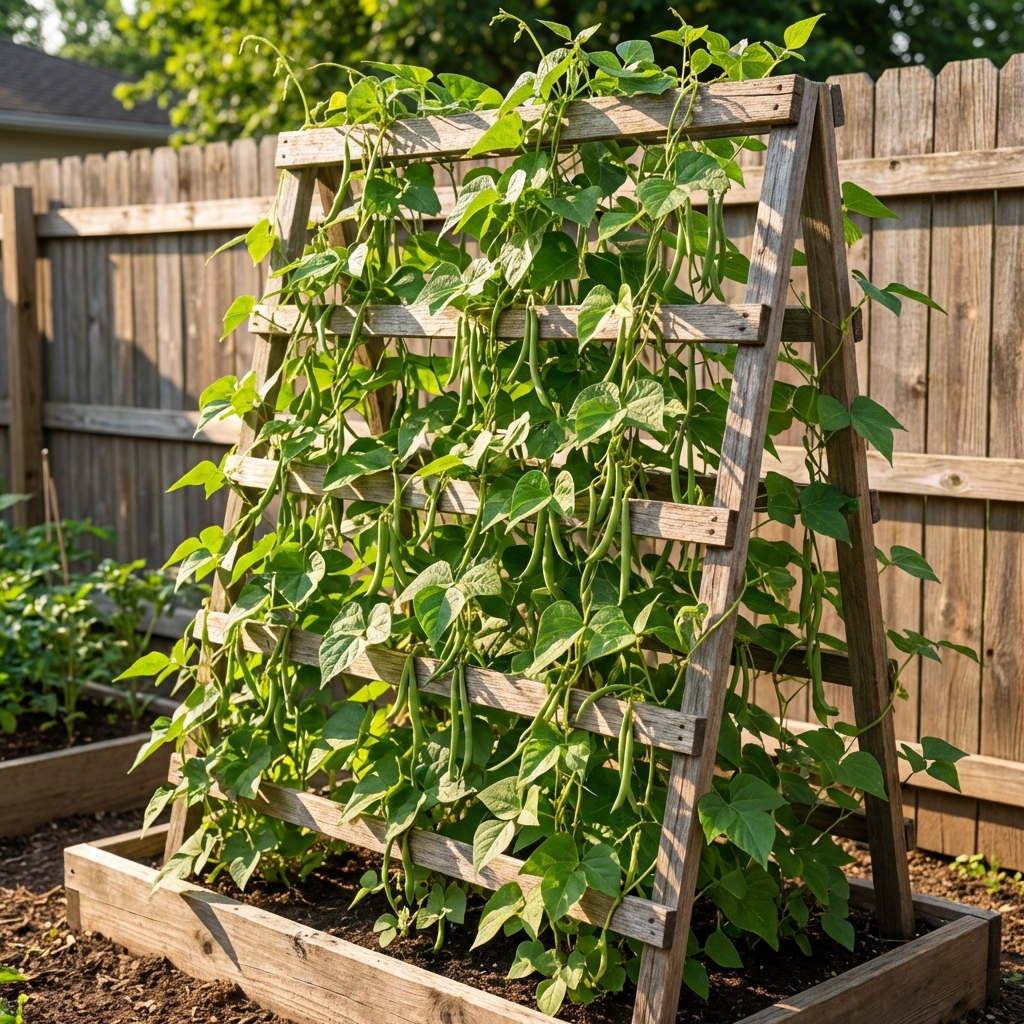
Pole beans will happily climb string, wire, netting, and fences, but your structure needs to handle wind and the weight of mature vines.
Simple trellis options that work
- A-frame trellis: two panels leaned together and tied at the top. Very stable.
- Cattle panel arch: strong, long-lasting, and easy to harvest from both sides.
- Strings on a top bar: great for raised beds if you anchor the top bar well.
- Fence or rigid mesh: convenient, just watch that your pods are reachable.
If you have heavy clay or sandy soil, do not rely on shallow stakes. Set posts deeper than you think you need. The trellis failing mid-season is a mess you only want to clean up once.
How tall?
Aim for 6 to 8 feet if possible. Shorter works, but expect vines to tangle at the top and trail back down once they run out of climbing space.
Planting pole beans
1) Prep the bed
Loosen the top few inches, remove weeds, and mix in compost. Water the bed the day before planting if the soil is dry.
2) Direct sow seeds
Pole beans do best direct sown. They can be transplanted, but they do not love root disturbance.
- Plant seeds about 1 inch deep (a bit less in heavy soil).
- Space seeds 4 to 6 inches apart along the trellis, and thin if you end up with a dense patch. A little airflow up front saves headaches later.
- If you plant in “hills,” do 4 to 6 seeds per hill with hills about 12 to 18 inches apart.
3) Water for germination
Keep the top layer of soil consistently moist until seedlings are up. If your soil tends to crust over, prevent it during germination by keeping the surface evenly damp and covering seeds with a non-crusting material (like sifted compost or a bit of potting mix). A very light mulch can help too, as long as seedlings can push through easily.
4) Help them find the trellis
Once the vines start reaching, gently guide them toward the support. Most varieties will start twining on their own once they touch something climbable, so you do not need to train them much.
Watering and mulching
Pole beans are fairly forgiving, but inconsistent watering is a common reason for:
- Flowers dropping without setting pods
- Tough or stringy pods
- Slower growth during hot weeks
A good target is about 1 inch of water per week, more during heat waves, in containers, or during flowering and pod set when consistency matters most. Water at the base when possible and avoid soaking foliage late in the day, which can encourage leaf diseases.
Mulch helps keep moisture steady and cuts down weeding. Use straw, shredded leaves, or untreated grass clippings in a thin layer.
Feeding
Beans are legumes, which means they can work with soil bacteria to fix nitrogen. In many average garden beds, they do not need much fertilizer.
- If your soil is decent and you used compost, you can often skip feeding entirely.
- If plants look pale and growth is slow, use a light, balanced fertilizer or compost tea rather than a high-nitrogen product.
If you are planting beans in a brand-new bed with sterile bagged soil, an inoculant for beans can help, but it is not required for success.
Common problems
Seeds did not sprout
- Cold soil: wait for warmer temps next time.
- Too wet: soggy soil can rot seeds. Improve drainage and avoid overwatering.
- Old seed: beans lose viability faster than some crops. Try fresh seed.
Lots of leaves, not many beans
- Too much nitrogen: ease up on fertilizer and manure-heavy compost.
- Too much shade: move next season or trim nearby plants that are blocking sun.
- Heat stress: prolonged temps around 90 to 95°F and up can reduce pollination and pod set temporarily. Keep watering steady and wait it out.
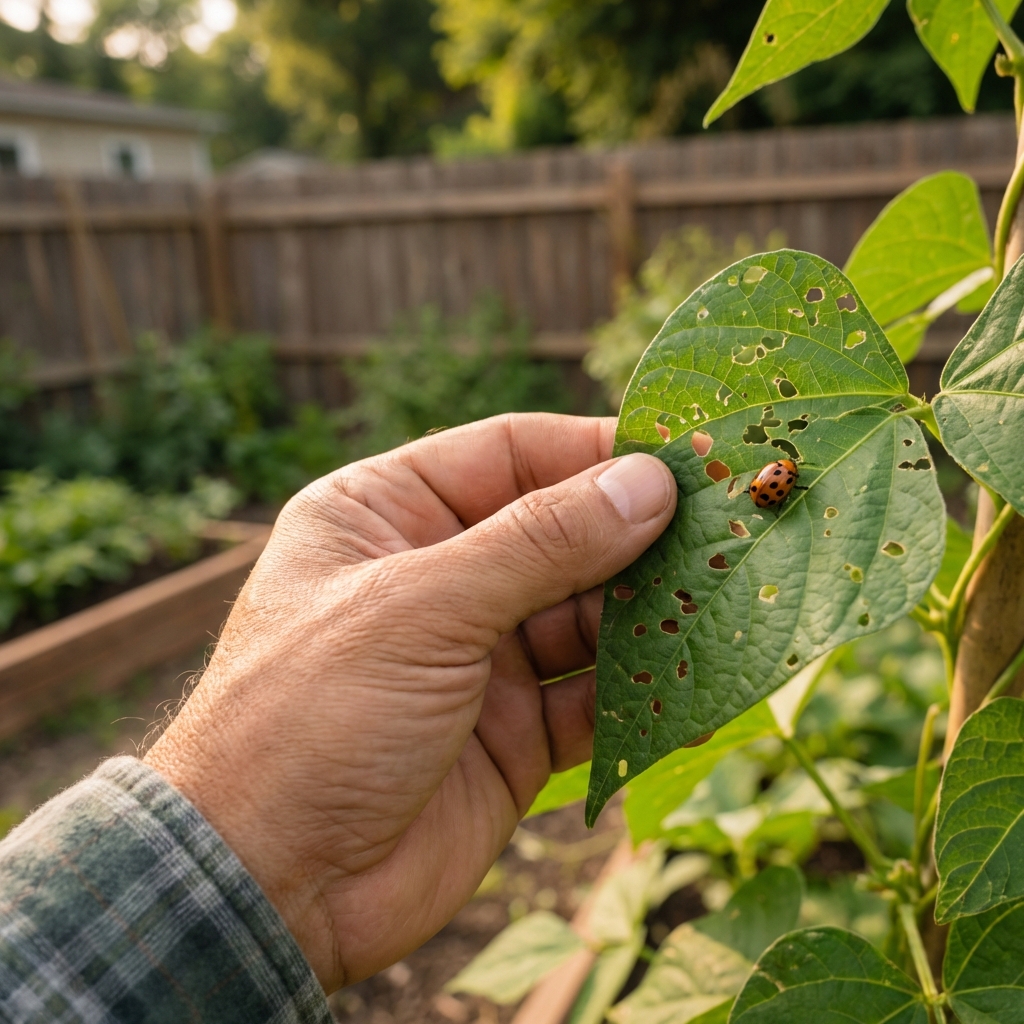
Leaves have holes
Look for the culprits in the morning and evening.
- Mexican bean beetles: yellow-orange adults and spiny larvae. Hand pick early, use row cover on young plants (get it on before beetles show up), and consider neem or insecticidal soap on young larvae if pressure is high.
- Slugs: common on seedlings. Use iron phosphate bait, reduce hiding spots, and water earlier in the day.
- Japanese beetles: hand pick into soapy water in the morning and protect plants with row cover if needed.
White powder on leaves
This is often powdery mildew. Improve airflow, avoid overhead watering late in the day, and remove the worst leaves. If it keeps coming back, do not crowd plants next time and rotate your bean location.
Other common diseases
Depending on your area, you may also see rust, anthracnose, or bean mosaic virus. The best prevention is simple: plant resistant varieties when you can, rotate your bean bed, keep weeds down, avoid working plants when they are wet, and remove badly infected plants rather than letting problems spread.
Pods are tough
Usually harvesting too late or letting plants dry out. Pick pods young and often, and keep watering consistent.
When to expect harvest
Most snap-type pole beans start producing in about 55 to 70 days, depending on variety and weather. Cooler nights can slow them down, and steady heat can speed them up.
Harvesting for a longer season
With pole beans, harvesting is part of the growing strategy. The more you pick, the more they tend to produce.
- Start harvesting when pods are firm, crisp, and the seeds inside are still small.
- Pick every 2 to 3 days during peak production.
- Use two hands so you do not rip vines off the trellis.
If you miss a week and pods get huge, do not panic. You can let a few mature for shelling or saving seed, but remove overmature pods if you want the plant to keep producing snap beans.
Succession planting
If your growing season is long enough, you can stagger plantings for a longer harvest window.
- Plant an initial sowing after soil warms.
- Plant a second sowing 2 to 4 weeks later if you have space and heat.
In very hot climates, a later planting can sometimes outperform an early one. In shorter seasons, focus on one strong planting and keep it healthy.
End of season tips
Clean-up
At the end of the season, cut vines at the base rather than yanking roots. Leaving roots in the soil helps add organic matter and reduces soil disturbance.
Rotation
Try not to plant beans in the same spot every year. Rotation helps reduce pest and disease buildup.
Saving seed
If you are growing open-pollinated varieties, you can save seed by letting pods dry on the vine until they rattle. Harvest before long wet weather hits, then finish drying indoors. Beans usually self-pollinate, but occasional crossing can happen, so if you want seed that stays true to type, grow just one variety or separate varieties by distance.
Quick checklist
- Plant after frost, in warm soil.
- Full sun and well-draining soil.
- Strong trellis first, then plant.
- Steady watering and mulch for consistency.
- Go light on nitrogen.
- Harvest often to keep production going.
Before you plant, check your last frost date and your typical summer heat patterns, then match your sowing time to warm soil and your variety to your climate. If you want ultra-local guidance, your county extension office is a great resource.

Jose Brito
I’m Jose Britto, the writer behind Green Beans N More. I share practical, down-to-earth gardening advice for home growers—whether you’re starting your first raised bed, troubleshooting pests, improving soil, or figuring out what to plant next. My focus is simple: clear tips you can actually use, realistic expectations, and methods that work in real backyards (not just in perfect conditions). If you like straightforward guidance and learning as you go, you’re in the right place.