If you have a pile of green beans coming in all at once, dehydrating is one of the easiest ways to save them without playing freezer Tetris. Dried green beans take up very little space, last a long time when stored right, and are surprisingly useful for soups, stews, and quick weeknight cooking.
This guide keeps it simple and practical. You will learn what beans dehydrate best, why blanching matters, how to dry them safely, and how to store them so they stay crisp and mold-free.
Why dehydrate green beans?
- Long shelf life: When fully dried and stored properly, beans can keep for many months. For best quality, plan to use them within about 6 to 12 months.
- Saves space: A jar of dried beans replaces a big bag in the freezer.
- No special equipment required: A dehydrator is easiest, but an oven can work too.
- Easy to use later: Rehydrate for cooking, or toss a handful straight into soups.
Quick safety note: Dehydrating preserves food, but it is not sterilization. If you ever notice mold, condensation in the container, or an off smell, discard the batch.
Best beans to dehydrate
You can dehydrate almost any snap bean, but you will get the best texture and flavor if you start with beans that are:
- Young and tender (before seeds bulge inside the pod)
- Fresh-picked or very recently purchased
- Free of damage (brown spots, soft tips, or insect holes)
Over-mature beans still dry fine, but they tend to be tougher when rehydrated. If your beans are already on the large side, plan to use them in slow-cooked dishes where texture is less noticeable.
Should you blanch?
Blanching is strongly recommended for green beans. It helps preserve color, improves rehydration, and slows enzyme activity that can cause off flavors during storage. You can dehydrate without blanching, but the results usually look duller and can taste more “old pantry” sooner.
Quick blanching method
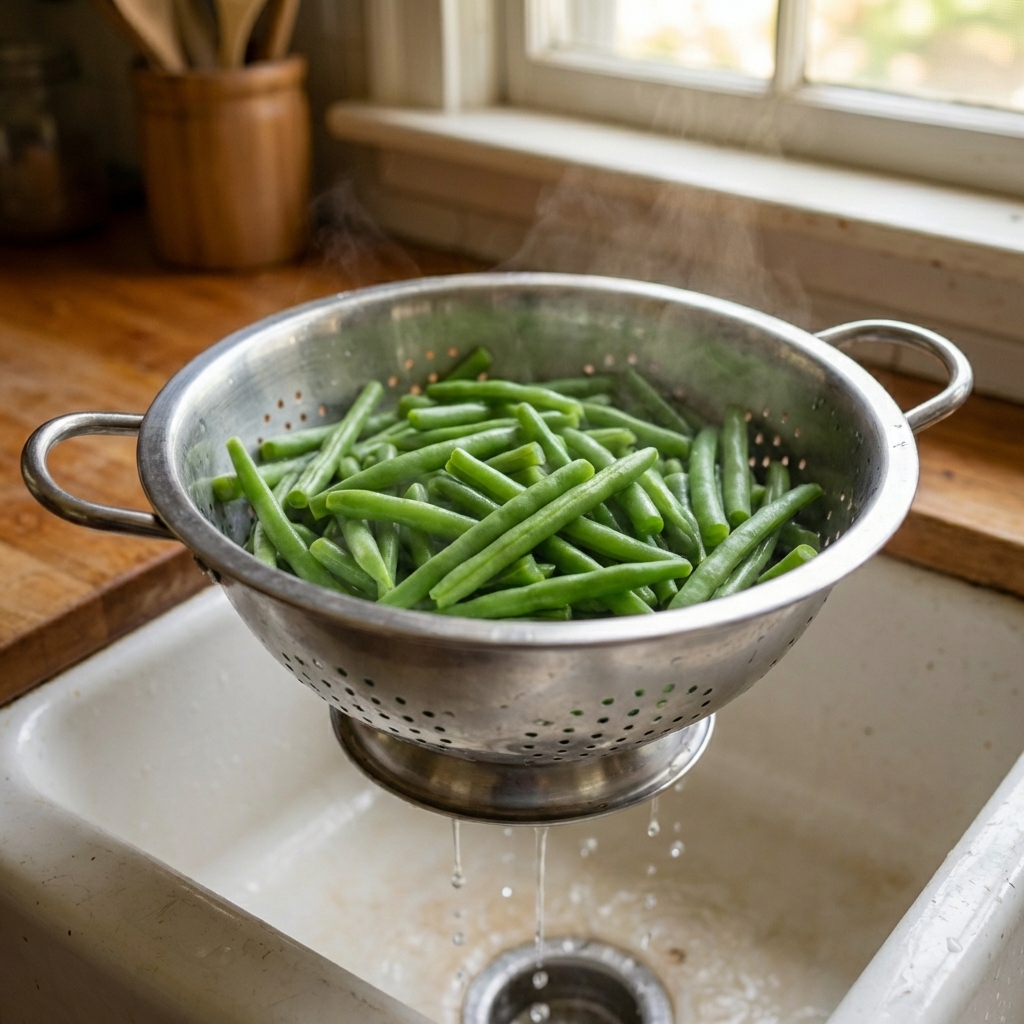
- Wash beans and trim ends.
- Cut into 1 to 2 inch pieces. Whole slender beans can work, but pieces dry more evenly and are easier to use later.
- Boil water in a pot. Drop beans in.
- Blanch 3 minutes (start timing when water returns to a boil).
- Cool fast in a bowl of ice water for the same amount of time.
- Drain well and pat dry with a clean towel. Less surface water means faster, safer drying.
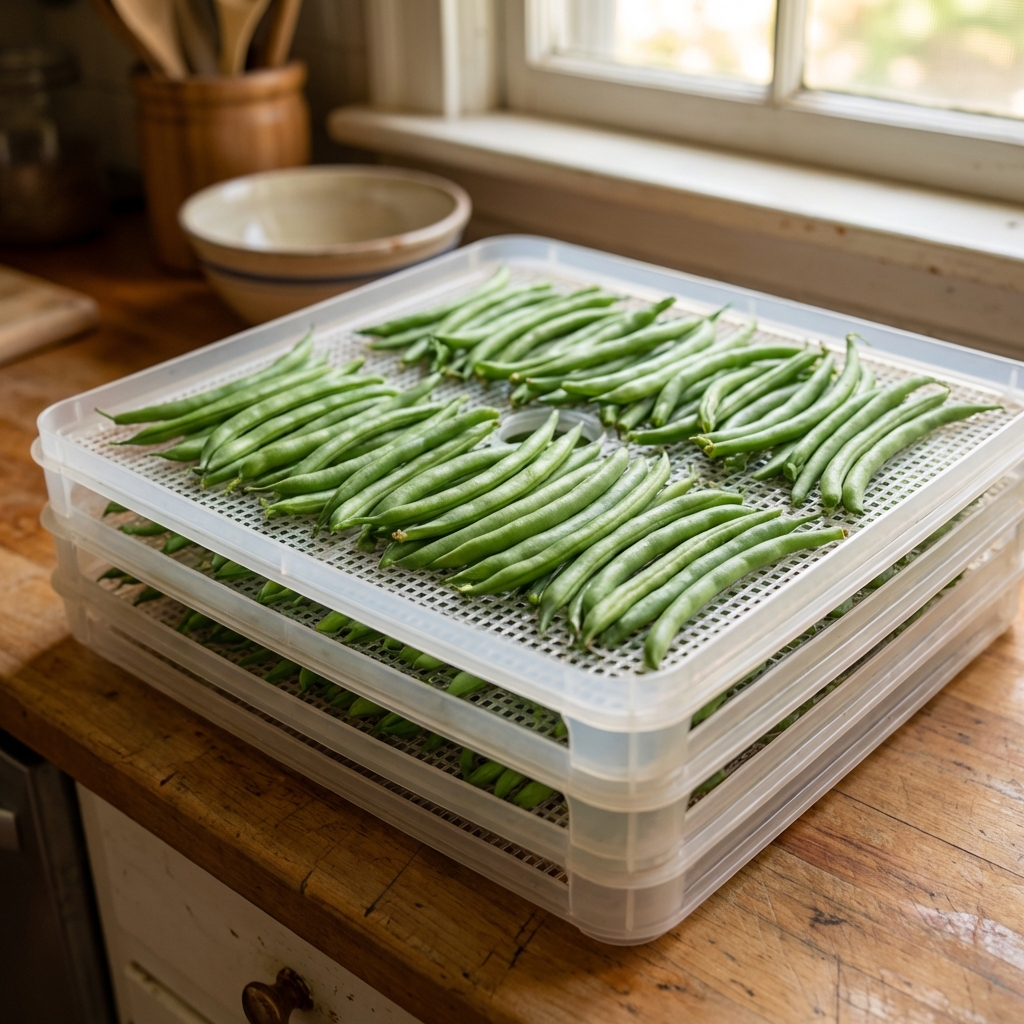
Dehydrator method
A dehydrator gives the most consistent results because it holds a steady temperature and moves air well.
Step-by-step
- Arrange beans in a single layer on trays. Do not pile them up.
- Set temperature to 125 to 135°F (52 to 57°C).
- Dry 6 to 12 hours, depending on bean size, humidity, and your dehydrator model.
- Rotate trays if your dehydrator has hot spots (common on budget units).
How to tell they are done
Properly dried green beans should feel brittle and snap cleanly. Test more than one piece, especially thicker ends. Also let a piece cool for a minute before testing since warm beans can feel softer than they really are. If they bend or feel leathery, keep drying. Any remaining moisture can lead to mold in storage.
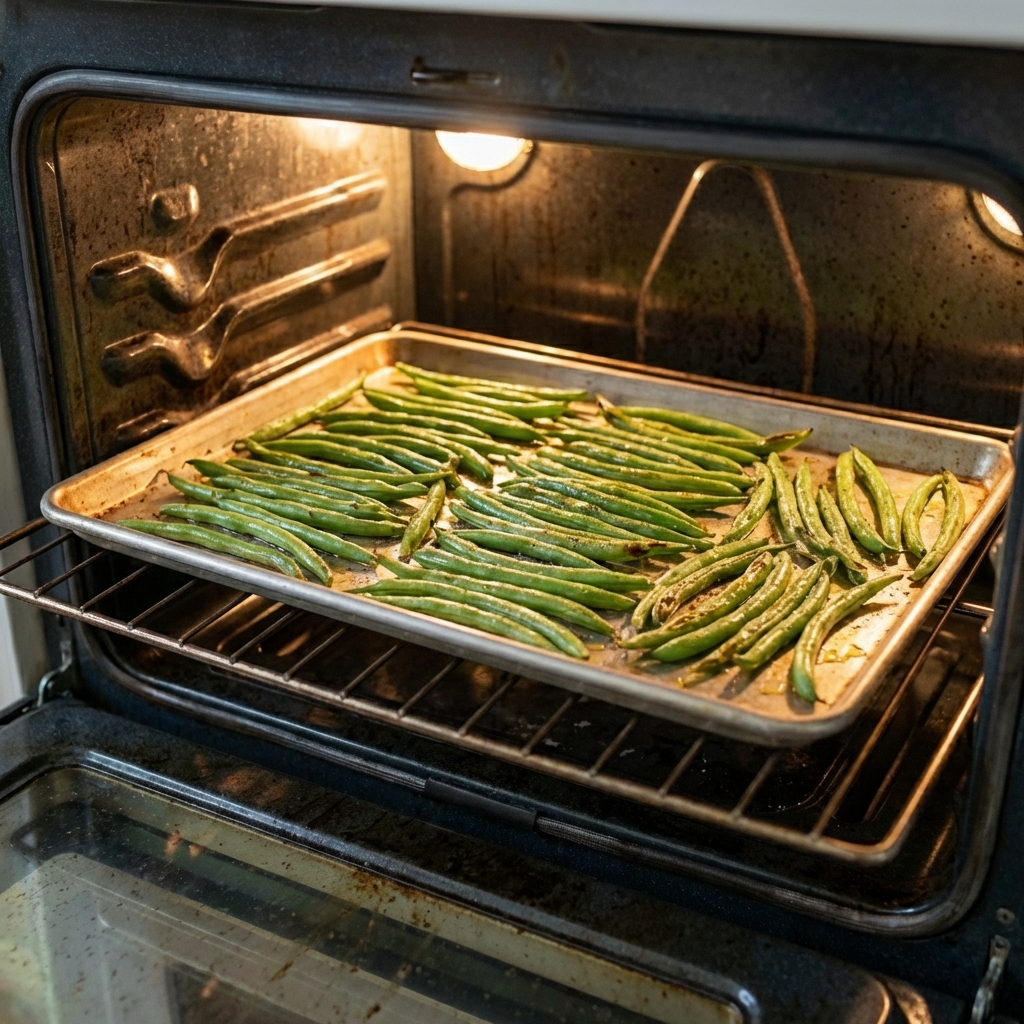
Oven method
If you do not have a dehydrator, an oven can work. The challenge is that many ovens do not go low enough, and airflow is limited. You can still get good results if you keep the temperature low and let moisture escape.
Step-by-step
- Set oven to the lowest possible setting, ideally 150 to 170°F (65 to 77°C).
- Line baking sheets with parchment paper or use a wire rack on the sheet for better airflow.
- Spread beans in a single layer.
- Vent if you can by propping the door slightly with a wooden spoon (only if safe for your oven and household setup) to help moisture escape.
- Dry 6 to 10 hours, stirring or flipping every hour or so.
Higher oven temps can work in a pinch, but they may darken beans and reduce flavor. Use the same doneness test: beans should snap, not bend.
Conditioning
Conditioning helps catch hidden moisture before you store a big batch long-term. It is simple and worth doing.
- Let beans cool completely after drying.
- Put dried beans in a clean, dry jar with a lid.
- For 5 to 7 days, shake the jar once a day and check for condensation or clumping.
- If you see moisture, put the beans back in the dehydrator or oven and dry longer.
If the beans stay dry and separate, you are ready to package them for storage.
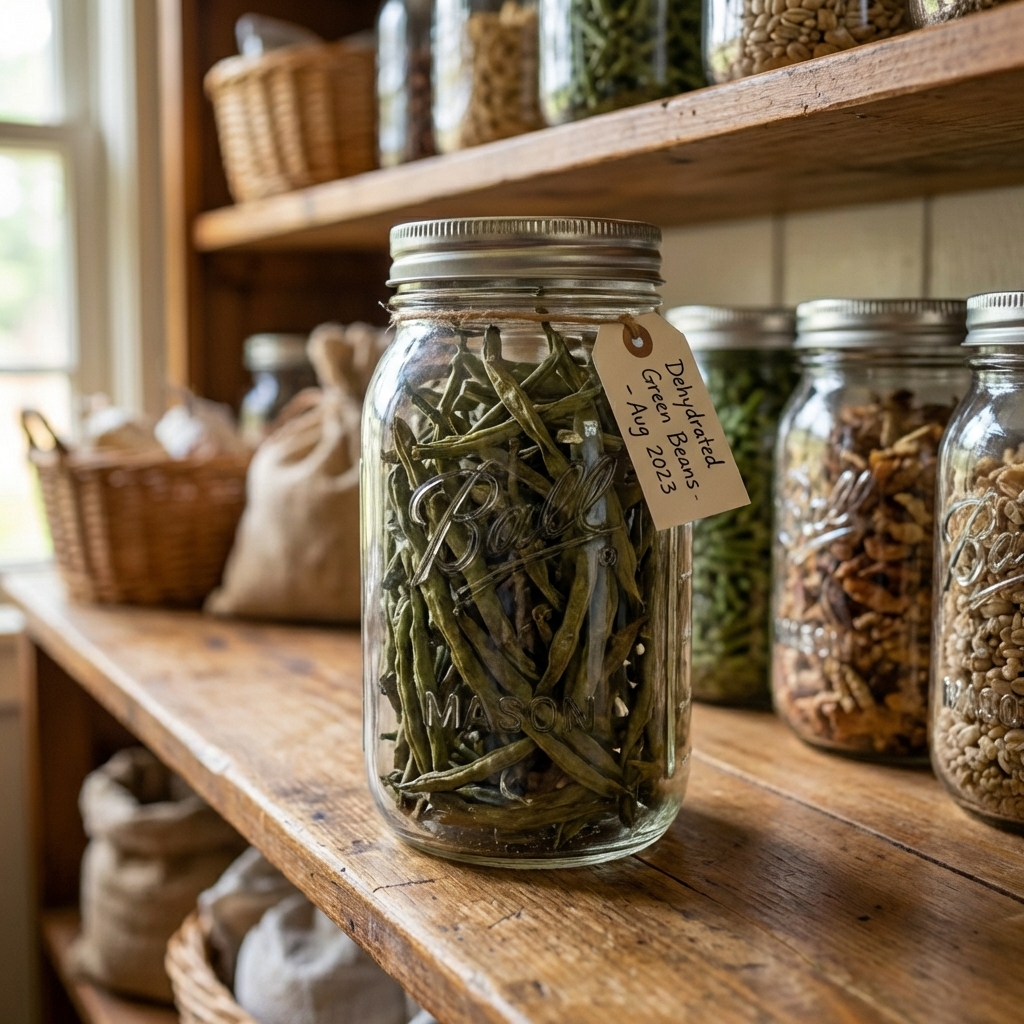
Storage
Dried beans are easy to store, but they hate humidity. Aim for airtight containers and a cool, dark pantry. Keep jars away from the stove, dishwasher, sunny windows, and other heat sources. Humidity matters more than altitude for dehydrating.
Best storage options
- Mason jars with tight-fitting lids
- Vacuum-sealed bags (great if you live in a humid climate)
- Airtight pantry containers with a good gasket
Optional extras that help
- Oxygen absorbers for longer storage (especially in jars)
- Desiccant packs to reduce moisture risk in humid areas
- Hygrometer if your pantry runs damp, so you can keep an eye on conditions
Label everything with the date. Even if it lasts a long time, it is nice to rotate through your stash and use the older jars first.
How to use dried green beans
Dehydrated green beans are not the same as fresh. Think of them as a pantry vegetable that shines in cooked dishes.
Rehydrating basics
- Quick soak: Cover beans with hot water (about 1 part beans to 2 parts water). Soak 15 to 30 minutes, then drain.
- Cold soak: Cover with water and soak 1 to 2 hours, then drain.
- Soup shortcut: Add directly to simmering liquid. Add extra broth since the beans will drink some up.
Easy ways to cook with them
- Add to chili, chicken soup, or vegetable soup.
- Stir into rice, beans, or lentils while they cook.
- Use in slow cooker meals where everything simmers for hours.
- Rehydrate and sauté with garlic and a little oil, then finish with salt and pepper.
Troubleshooting
My beans are leathery
They are not done yet. Keep drying until they snap. Leathery beans can mold in storage.
Condensation showed up in the jar
That means there was leftover moisture. Dry them again and re-condition. If you spot mold or an off smell, discard the batch.
The color is dull or brownish
This is usually from skipping blanching, drying too hot, or storing in light. It is often still safe if fully dried, but the flavor may fade faster.
Some pieces dried faster than others
That is normal if sizes vary. Next time, cut pieces more evenly and rotate trays or stir occasionally.
My practical take
If you want the easiest win, do this: blanch, dry at 125 to 135°F, and do not rush the final snap-dry stage. Most storage problems come from beans that were “almost dry.” Almost dry is not dry.
Once you get a good batch under your belt, dehydrating green beans becomes one of those quiet little systems that makes gardening feel more manageable. Harvest comes in, beans go on trays, and your pantry fills up without stress.
Quick reference
- Prep: Wash, trim, cut to 1 to 2 inches.
- Blanch: 3 minutes, then ice bath.
- Dehydrator: 125 to 135°F for 6 to 12 hours.
- Oven: Lowest setting, usually 150 to 170°F, 6 to 10 hours, vent if possible.
- Done: Brittle and snaps cleanly (cool a piece and test a few).
- Condition: Jar test 5 to 7 days.
- Store: Airtight, cool, dark, dry. Best quality within 6 to 12 months.

Jose Brito
I’m Jose Britto, the writer behind Green Beans N More. I share practical, down-to-earth gardening advice for home growers—whether you’re starting your first raised bed, troubleshooting pests, improving soil, or figuring out what to plant next. My focus is simple: clear tips you can actually use, realistic expectations, and methods that work in real backyards (not just in perfect conditions). If you like straightforward guidance and learning as you go, you’re in the right place.